Are you an aspiring, or accomplished, musician, DJ, podcaster or radio show host that wants to do your show from inside Sansar? Well good news you can with streaming web audio and this guide will show one way to get that setup.
SHOUTcast is a free cross platform media streaming server software.
SHOUTcast setup can be as technical or non technical as you can afford to be. If you have ways and means to host your own web server you can host your own free SHOUTCast server, here is a great article that shows the SHOUTcast part - How To Setup An SHOUTcast Internet Radio Station.
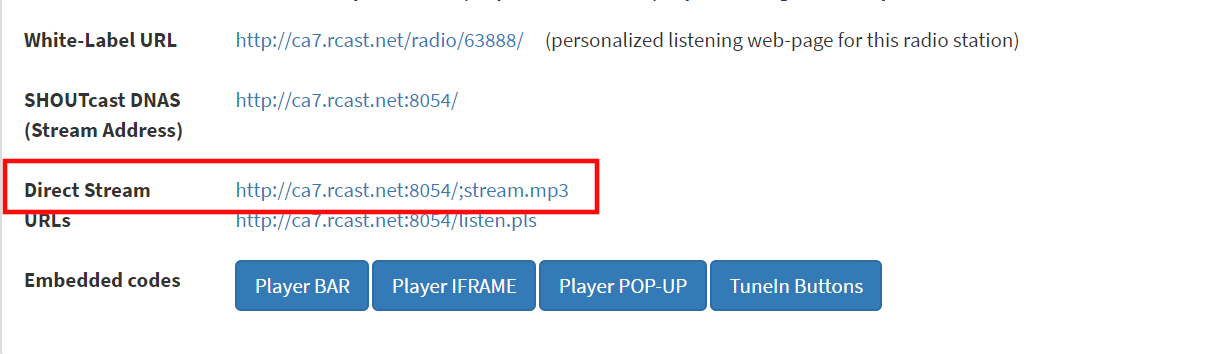
Direct Stream Links
There are many free solutions to hosting SHOUTcast but all the ones I tried were limited in one special way, they lack providing a web audio stream URL, also called a “Direct Link” that is required to stream in Sansar.

Rcast
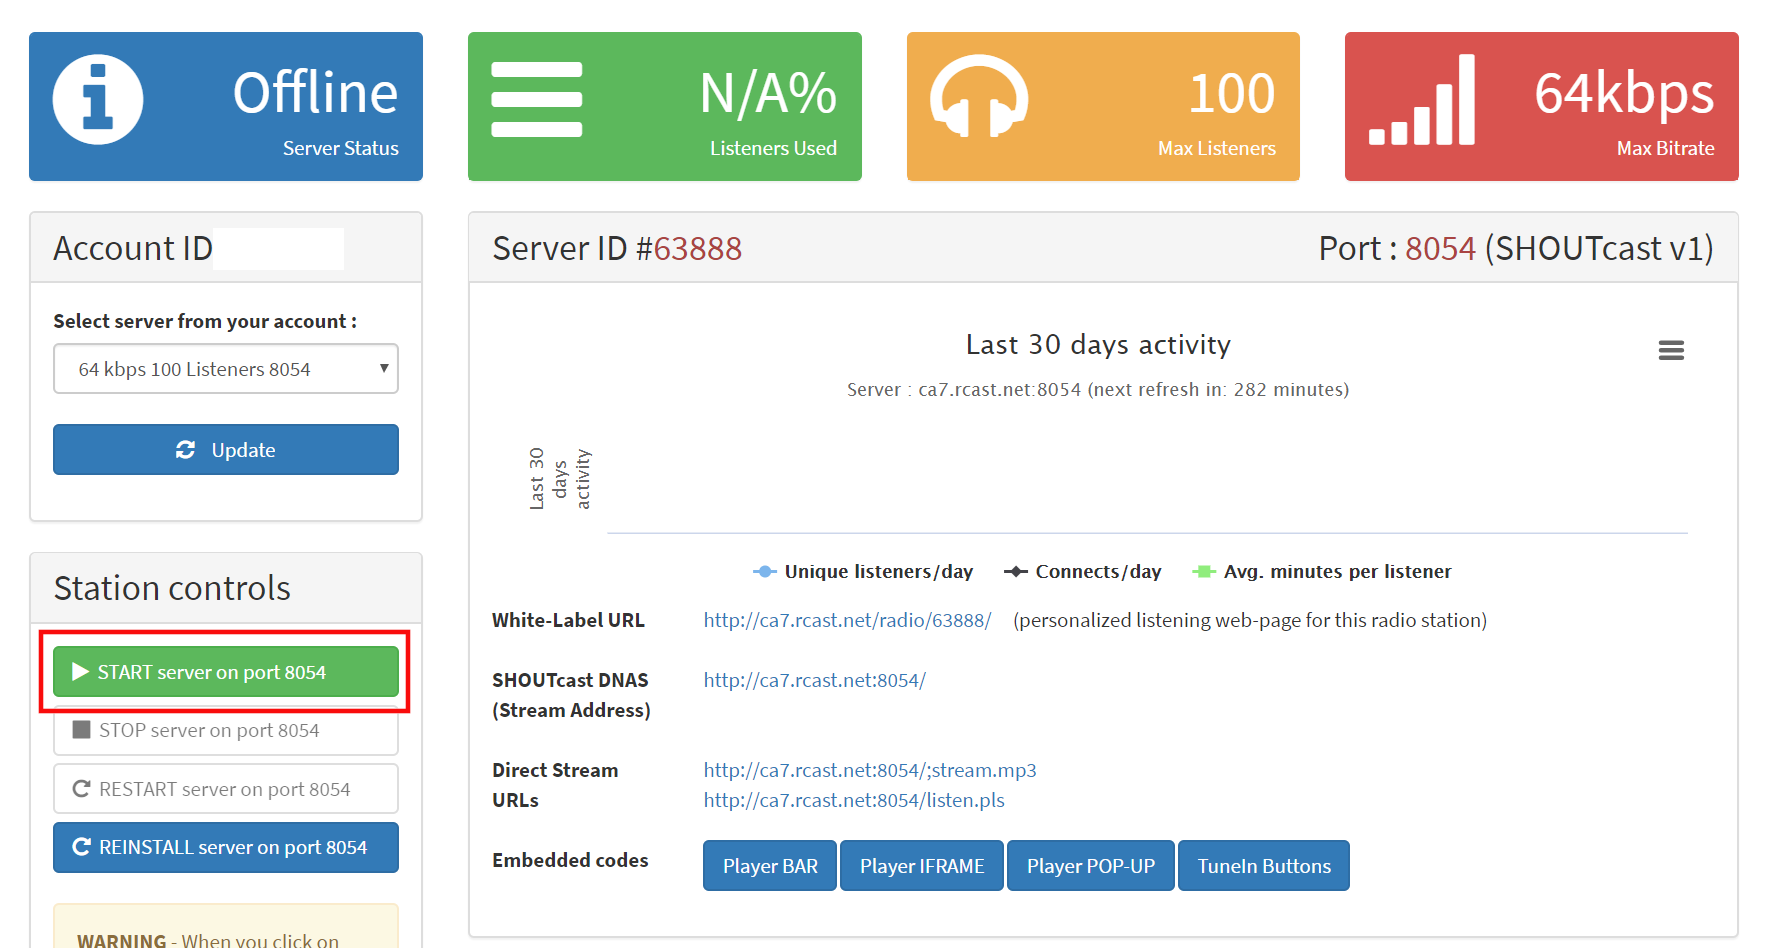
I tried a few different options in hosting solutions (free-shoutcast, SHOUTcast, Caster.fm) before I chose Rcast for its price and ease of use. For $3.99 per month you can have you own streaming radio station for up to 100 listeners.
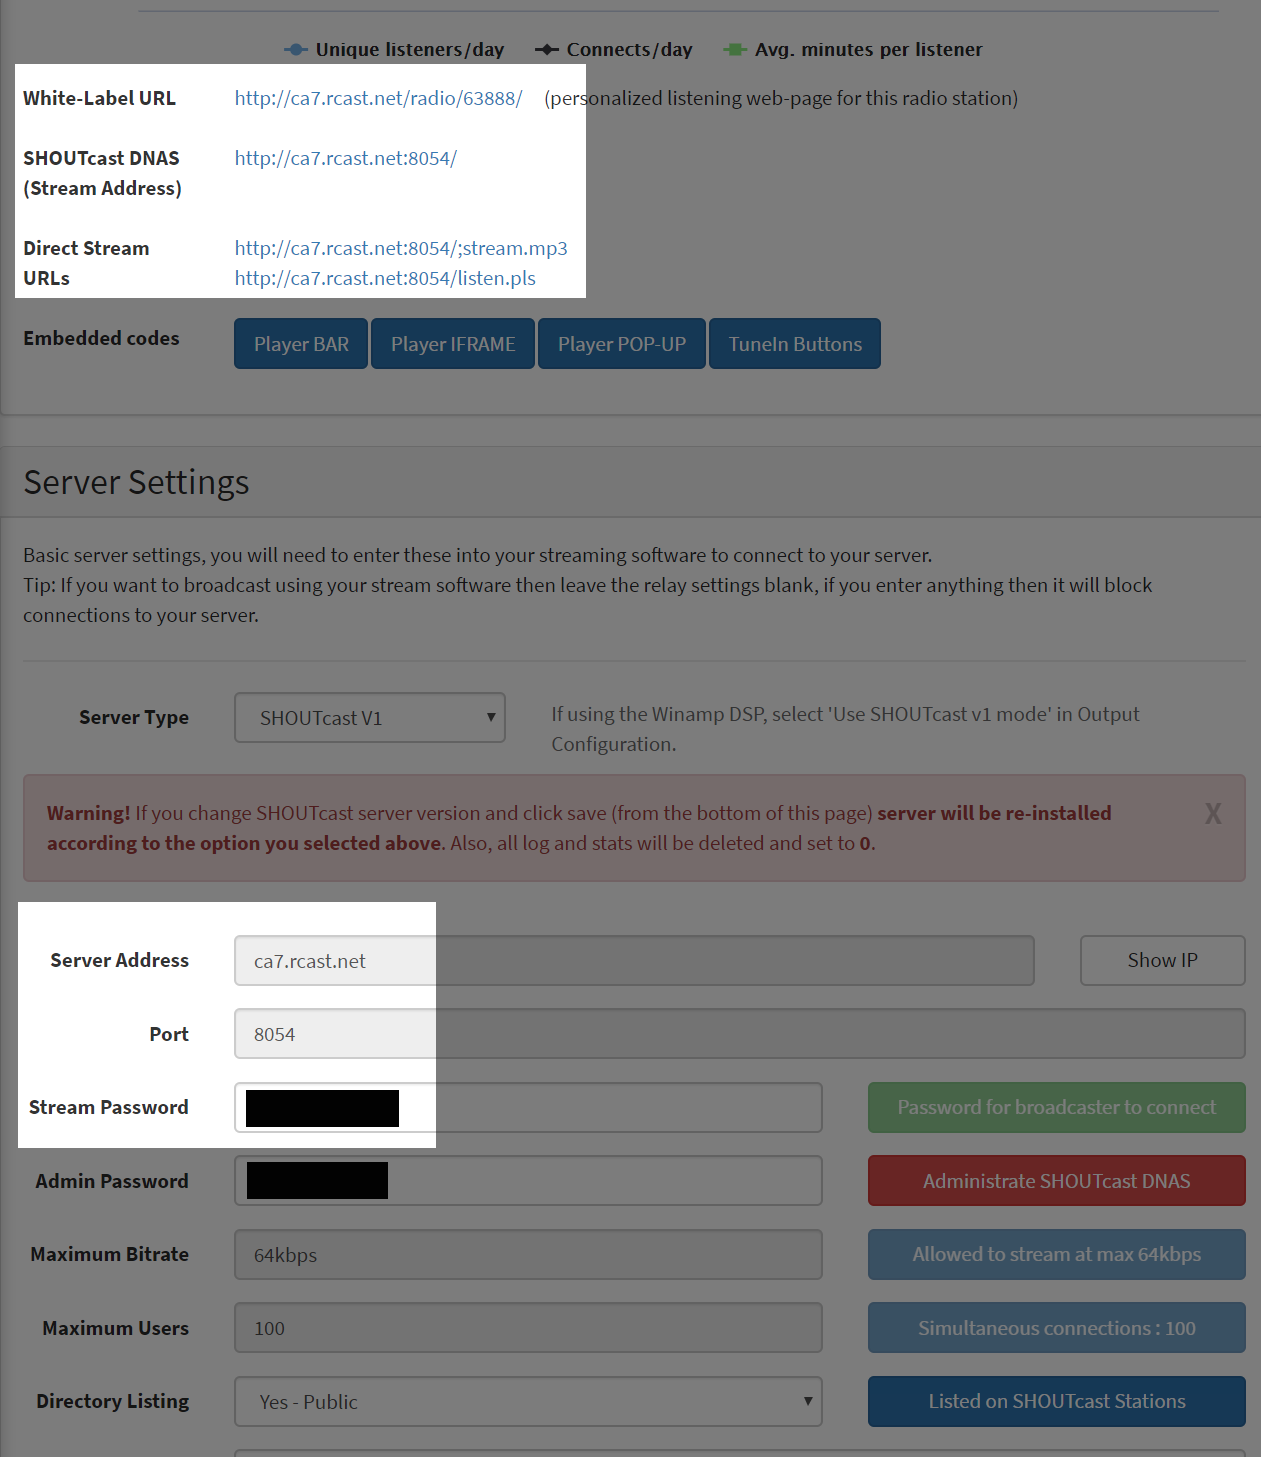
Once you complete your sign up you will be taken to your Dashboard page. From there choose “View Details” of your Product.

From there look for a big green button to “Login to Control Panel”.

On the left side of you control panel you will see another green button to start your server.
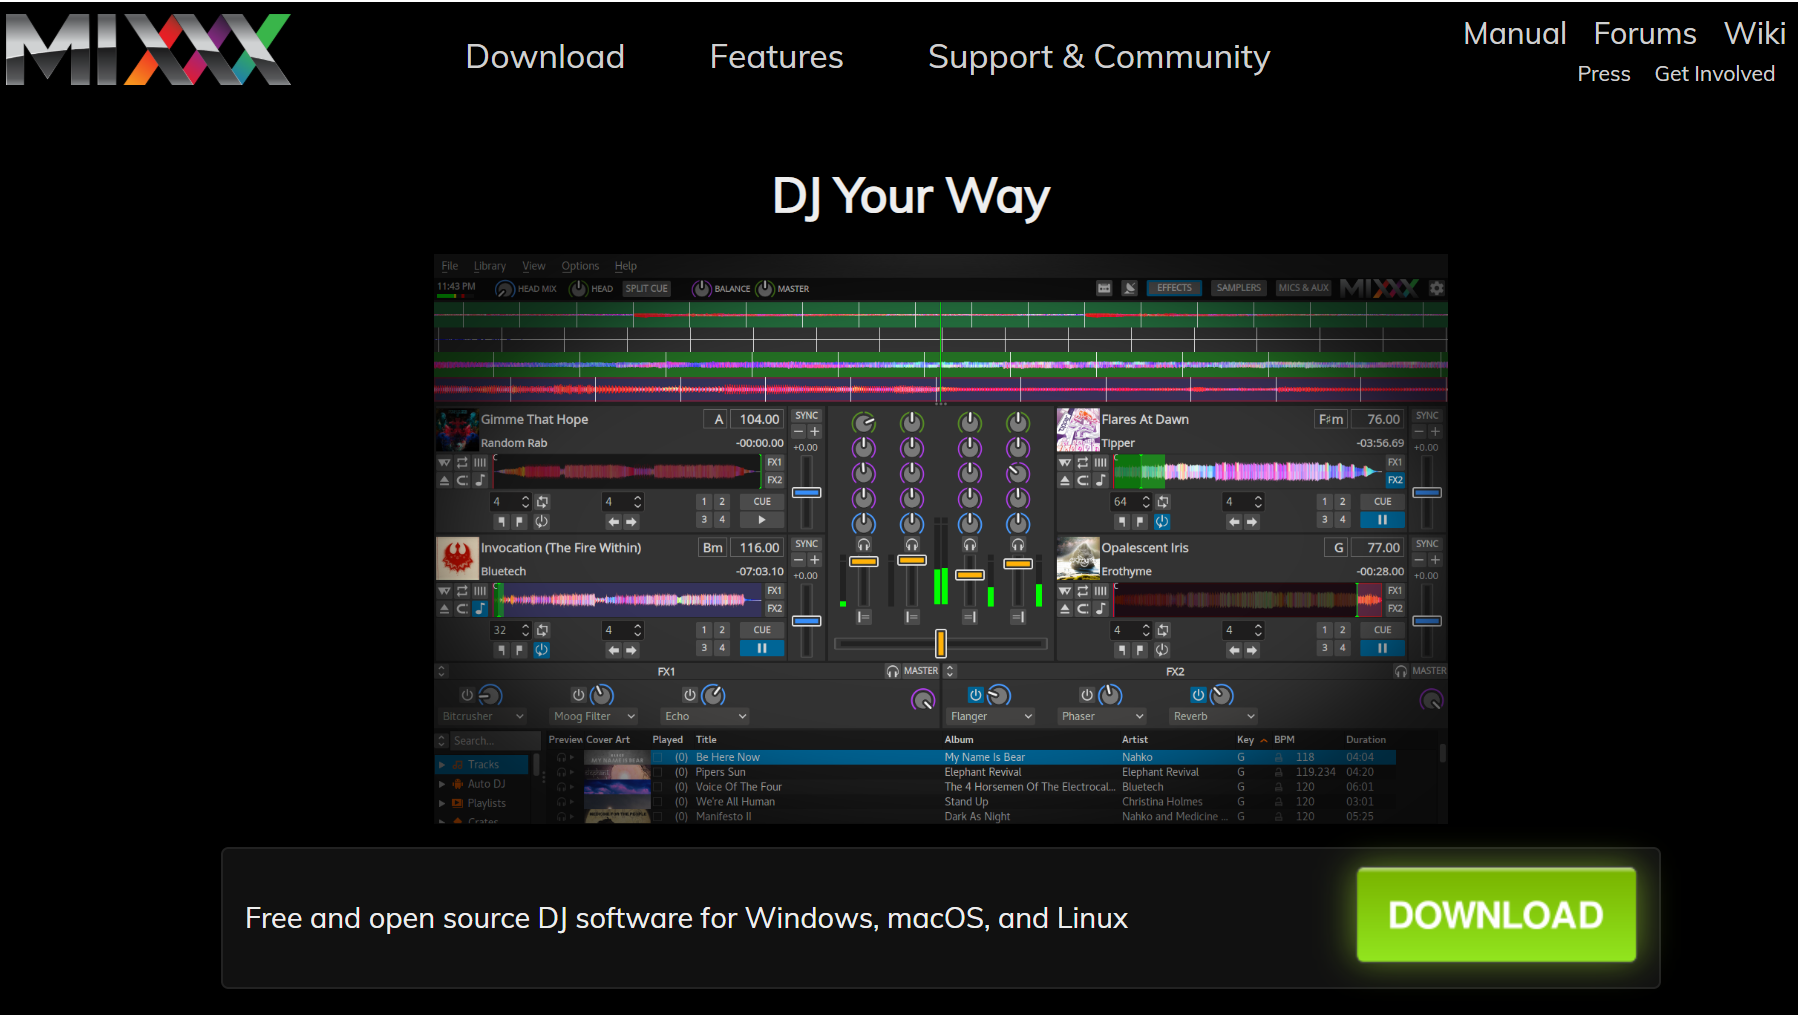
MIXXX
There are many options for broadcasting your stream with third party broadcaster like, WinAmp with Edcast or BUTT. I went with MIXXX for best range of hardware integration options as well as range of use from novice to professional DJ.
I also would like to note here it is preferable that you have a separate computer from the one you are running Sansar on for running broadcaster software as the default settings will be using your computers sound card for input output, the same as Sansar.
Download MIXXX and install with default settings.
Due to licensing MP3 streaming is not supported with MIXXX out of the box, you must download and install the LAME MP3 encoding tool yourself, see the MIXX Wiki for instructions on your platform.
If you’re like me you had no idea how to use the tracks you just imported in the installation and all the knobs and buttons are intimidating, no fear watch this quick Mixxx Tutorial - Beginner’s Guide you’ll be acquainted with the basics in no time.
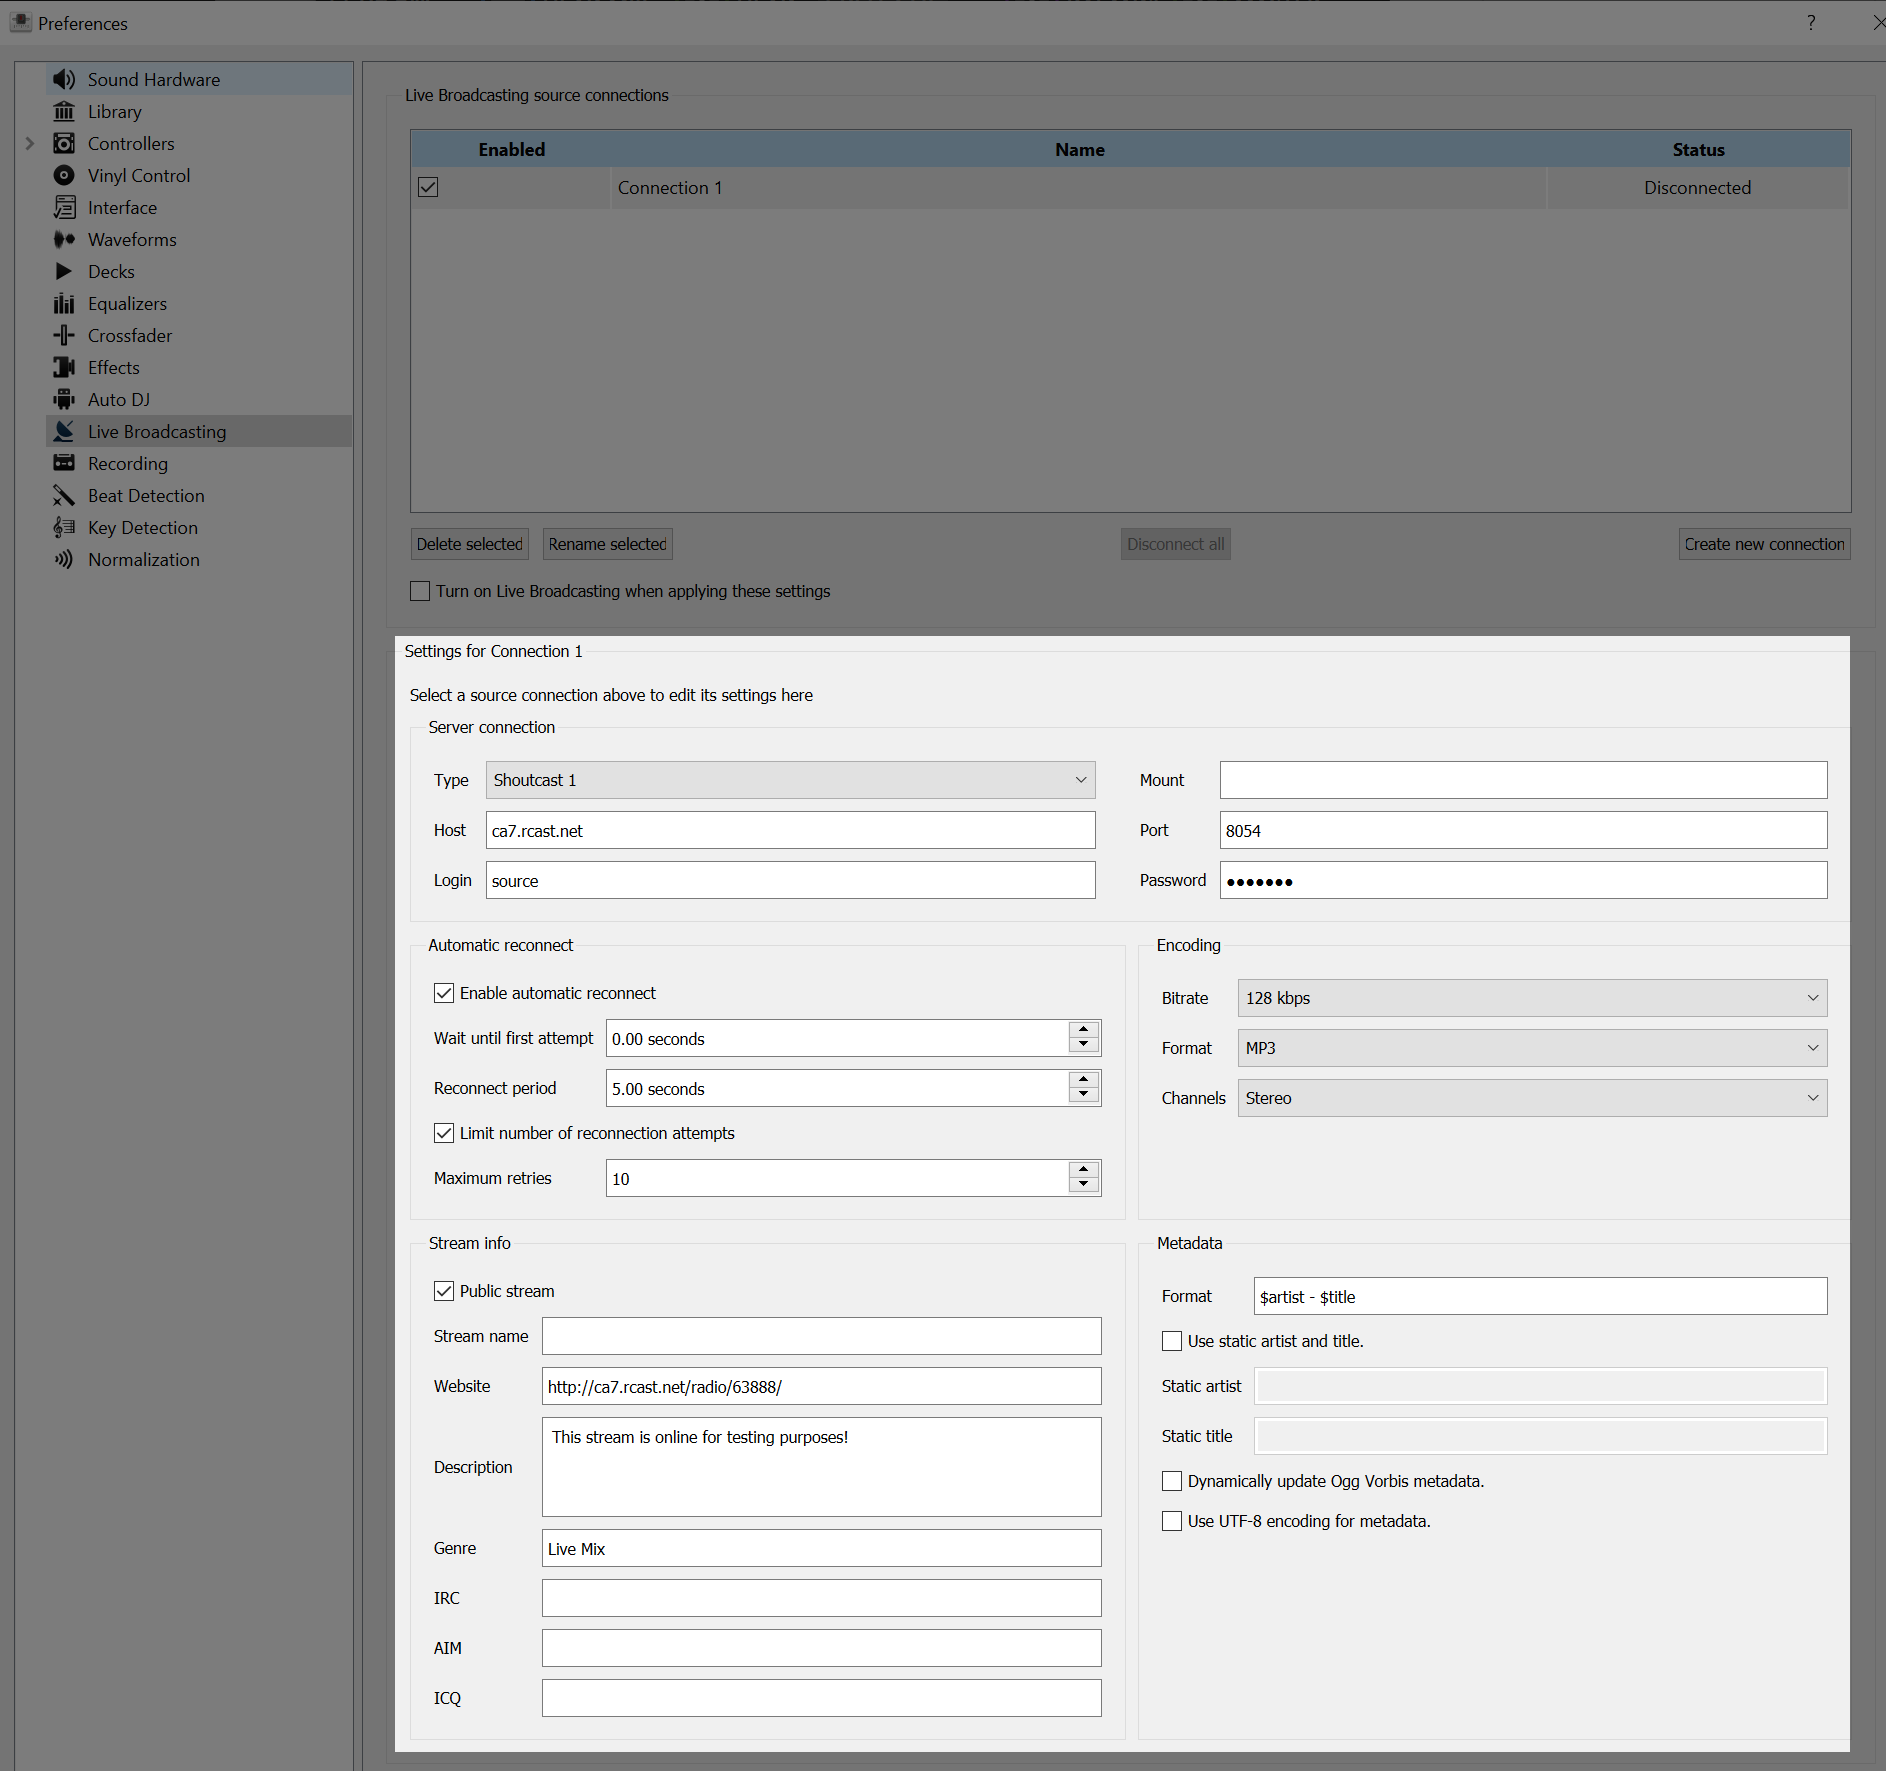
Connecting to your host
All the information you need to connect to the host can be found on the rcast control panel. In MIXXX open up preferences (ctrl-p on windows), select Live Broadcasting menu item. Your connections should look like below, with your “Login” set to source, encoding set to MP3 and all other values coming from your rcast control panel.
Save your configurations and close preferences. In the top right corner of MIXXX you will see a connection icon, click it to connect.
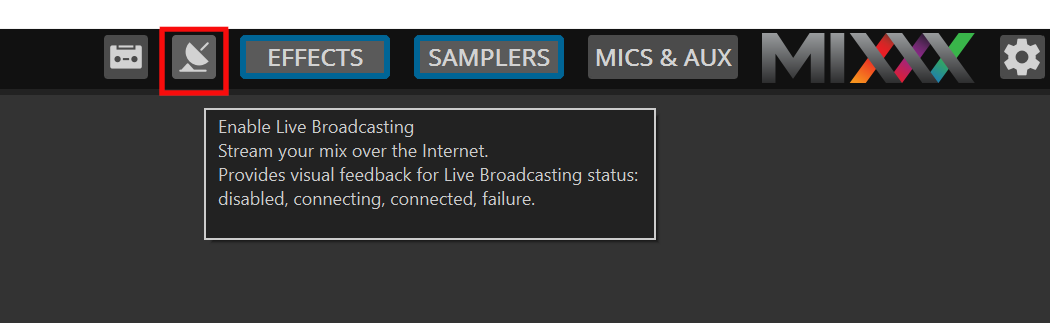
The icon will turn yellow while connecting, magenta if there is an error or white if the connections was a success. If you are having problems connecting double check your settings and if all else fails read the MIXXX User Manual for more information on connection settings.

Stream in Sansar
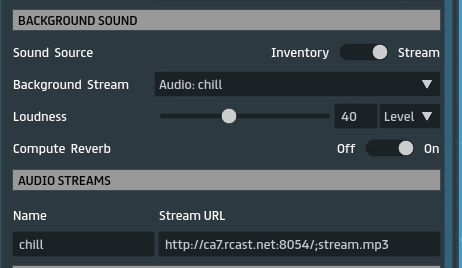
The Direct stream URL ending in .mp3 in your rcast control panel is the correct link to use with Sansar.
Follow the Streaming web audio guide on help.sansar.com for connecting your web audio stream through the Scene Settings panel, or add as is or modify this Audio Controller Script to suite your needs.
Notes
*ShoutVST* enables streaming sound into Icecast and SHOUTcast directly from VST hosts, ideal for streaming live performances directly from applications like Traktor or Ableton