Welcome to intro to quests demo blog, here you will find the demo code and step by step for recreating the demo from Scripting Office Hours held in Sansar on July 30th 2019.
Sansar’s latest release included the beginnings of the quest script api for creating your own quests. See official documentation here. This demo will setup a simple quest with two objectives using both custom scripts and built in system quest scripts.
SHOP
Open the store, either in a web browser or in Sansar, and get the following FREE items:
Download LowerGravityAgentInteraction script from sansar-script github repository
CREATE QUEST DEFINITION
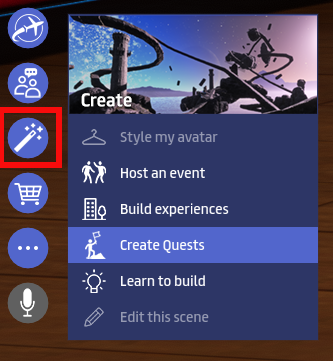
Open Sansar, from main menu navigation choose Create > Create Quests.
In the quest creator panel click new quest

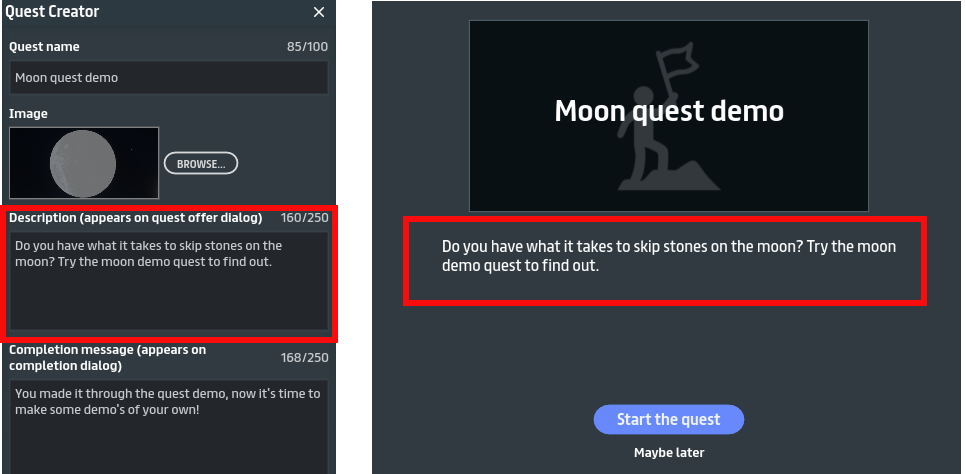
Start by entering a quest name.
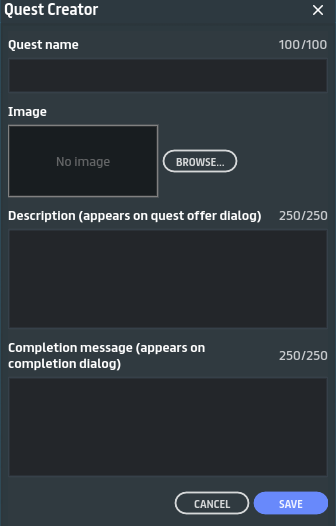
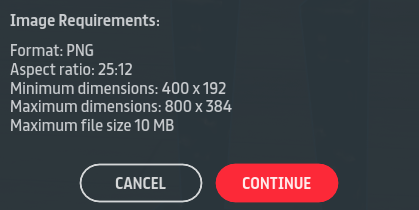
Next input is a quest image, you can either upload an image that fits the exact image requirements, or you can use the screenshot tool to add a quest image later (The screenshot tool will crop your image to exact specified dimensions) If you do not add an image a default image will be provided by the api.
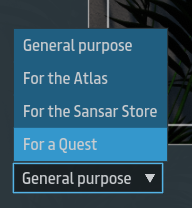
Screenshot tool can be found from main menu Socialize > Take a photo
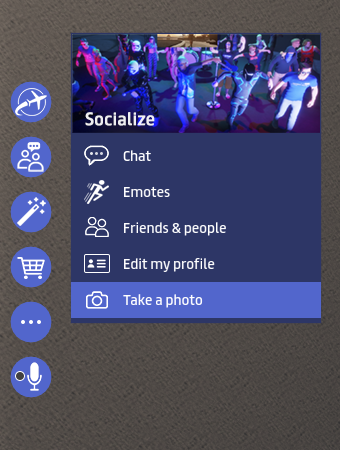
Choose ‘For a Quest’ option to get the correct dimensions
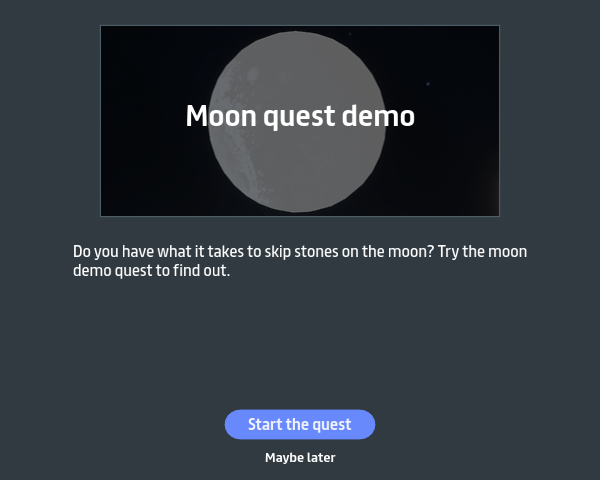
Quest Description is the next input this description will be shown when the quest is offered.
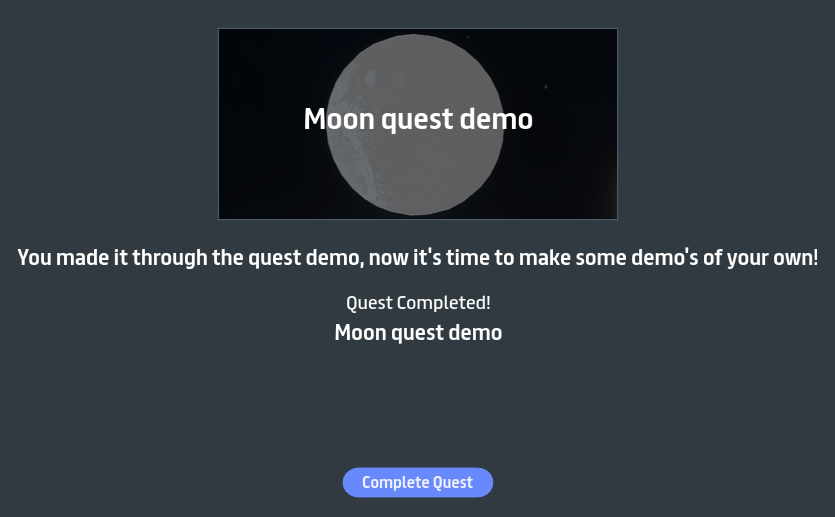
The last input is the completion message which will be shown when the quest is completed.
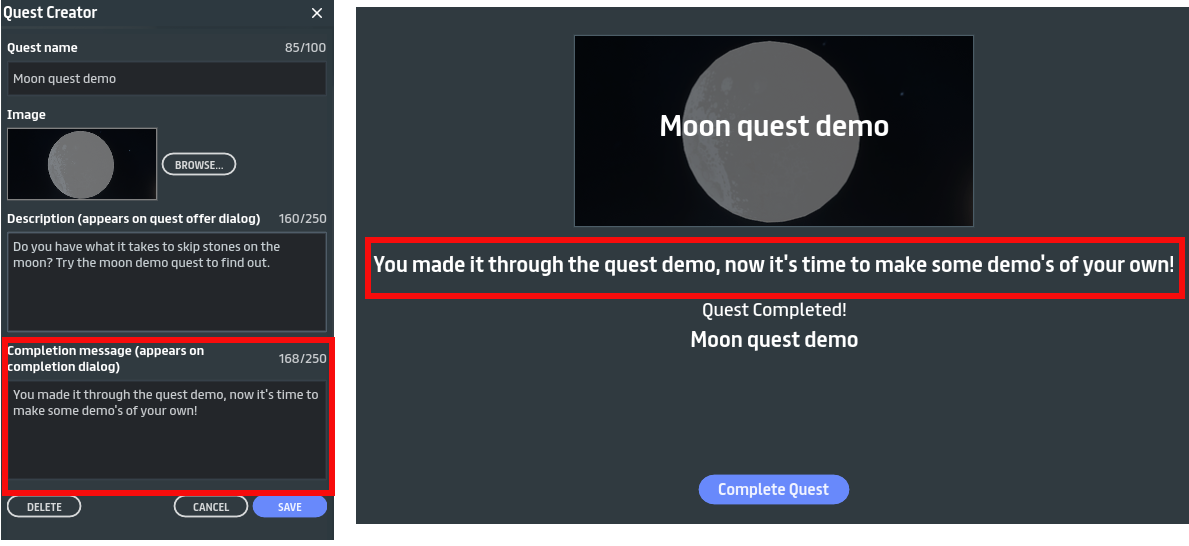
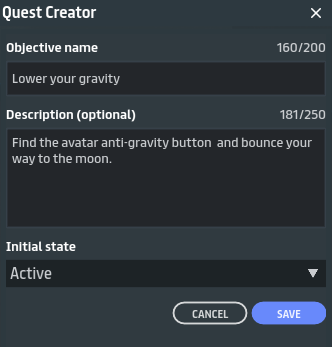
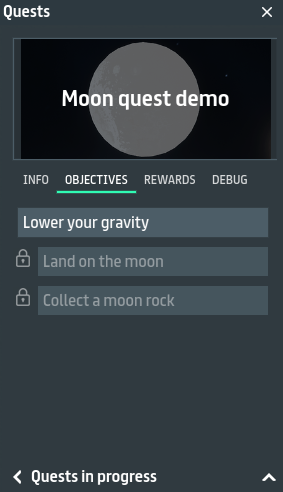
After hitting save on your new quest information, you will be brought to the quest objective editor. Click New to add an objective to your quest.

The first input is objective name, it is suggested to make this a brief command to complete the objective.
The next input, optional extended description, is intended for longer text and is a good place to give hints or provide details to the quest story.
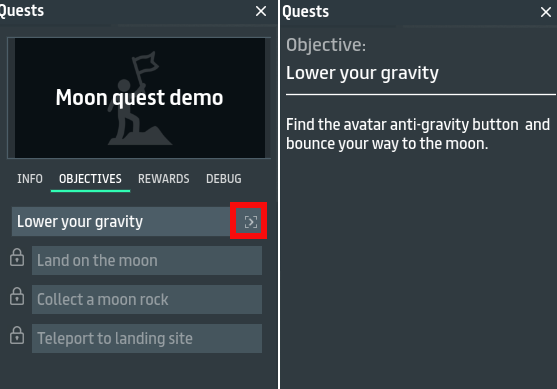
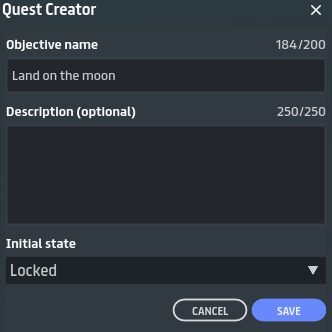
The objective state can be set here to either Active or Locked. Generally you want your first objective to be Active, as documentation states, if you start off with a Locked objective you would have to provide a script command to unlock it.
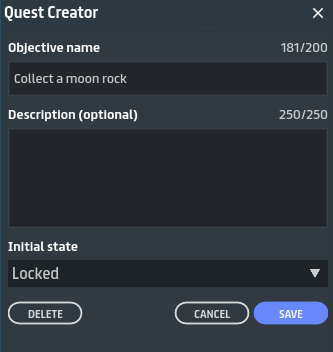
We will make the rest of the objectives state Locked and the quest system will unlock each objectgive as the objective preceding it is completed.
QUEST GIVER
Now let’s implement the quest we created by either opening an existing experience you own or create a new one (if you are new to creating experiences inSansar see Quick start: Creating experiences in Sansar)
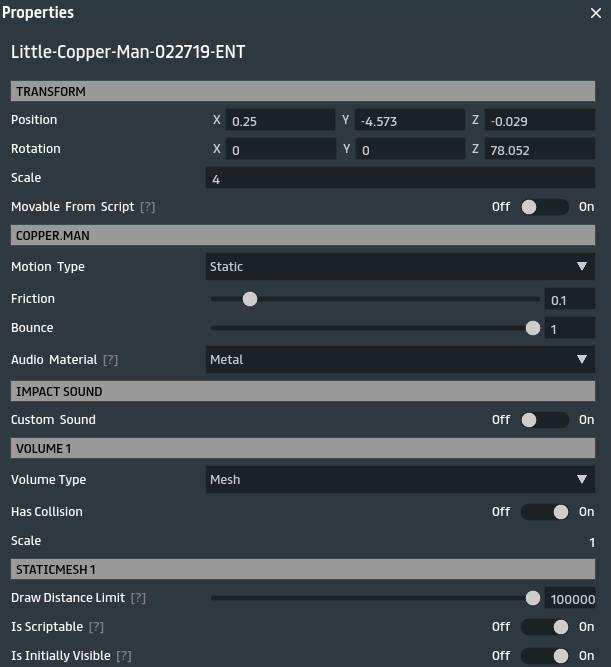
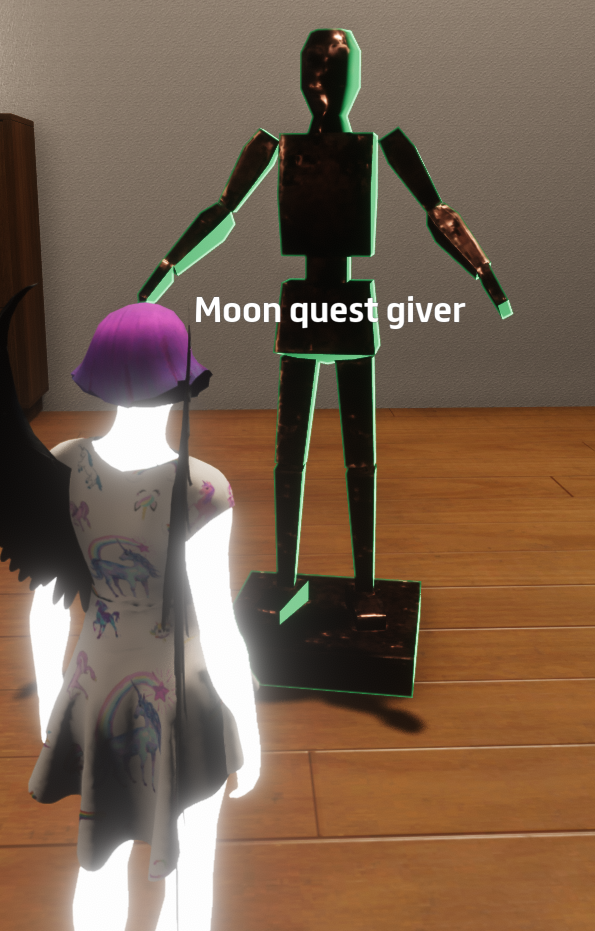
Start by adding the “Quest Giver”, a clickable object that will offer your quest to users. Drag the ‘Little Copper Man’ object into your scene, adjust the object’s properties by right clicking the object in the scene or by selecting it in the Scene Objects panel to open Properties panel. Set Motion Type to static and set Is Scriptable to On, I also adjusted the Scale to 4 to fit my scene.
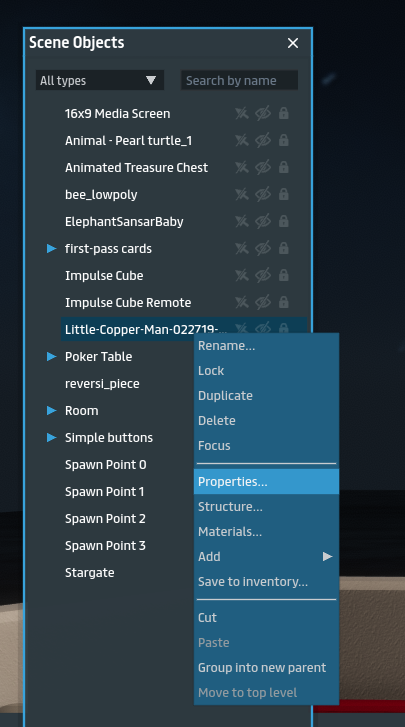
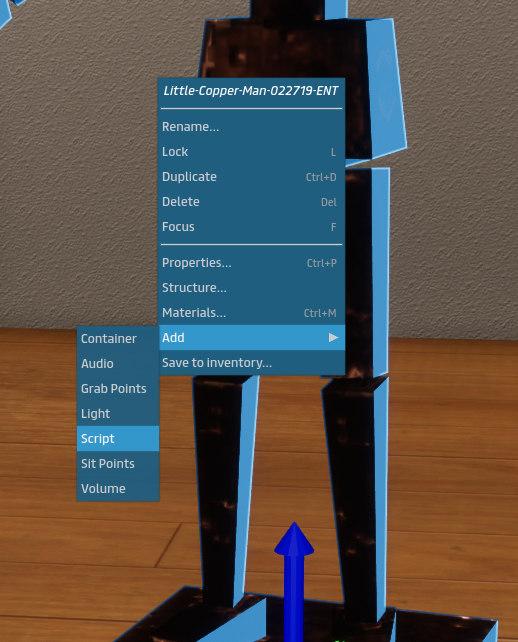
Add a script by right clicking either the object itself or selecting it in the Scene Objects panel and choosing Add > Script.
Select the Quest Script Library and in then select QuestGiverInteraction option. This is the basic option for a quest giver interaction which handles offering a quest by displaying a prompt when a player approaches and sending the offer quest event when a player accepts.
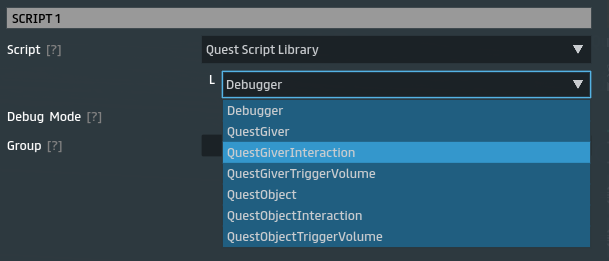
The QuestGiver script is more advanced, it offers quests to players in response to simple script commands, and sends simple script events when a quest state changes, we won’t be using this for the quest giver interactions but we will demonstrate how this works using an objective interaction in steps ahead.
The QuestGiverTriggerVolume is also a simple interaction, it offers a quest when a player enters a trigger volume, we will use a trigger volume interaction with an objective to demonstrate how this works.
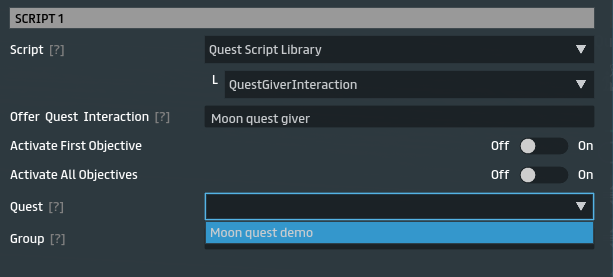
Offer Quest Interaction input is the display text that will be shown when a player approaches your Quest Giver.
Next Choose the quest you want this interaction to offer by selecting it from the dropdown of your available quests.
You should now be able to build and visit your scene to see your quest giver interaction text and the quest offer and accept interactions.
Trigger the offer dialog and accept the quest.
DEBUGGING
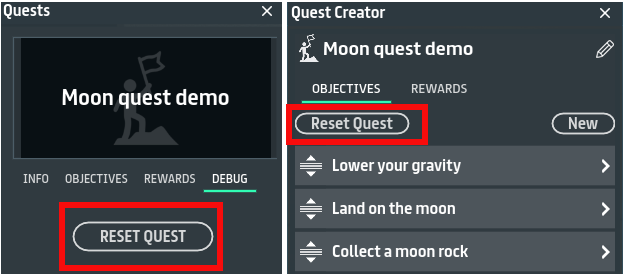
Now is a good time to talk about the quest debugging tools. The most obvious are the RESET QUEST buttons, found on both the quest player log and in the quest creator tool. These buttons give you the ability to “reset” your progress on the specific quest you are authoring and delete any progress you have made allowing you to restart the quest over again from the quest giver offering.
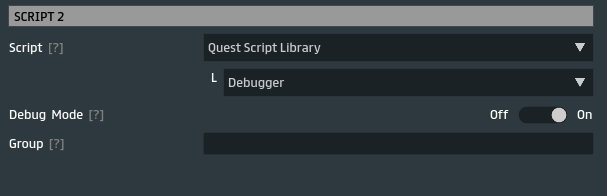
In the Quest Script Library you are given a Debugger script which you can attach to an object in the scene to log quest script messages to the debug console. Let’s go back to editing our demo scene and add another script to the ‘Little Copper Man’. Select Quest Script Library > Debugger, and make sure Debug Mode is flipped to On.
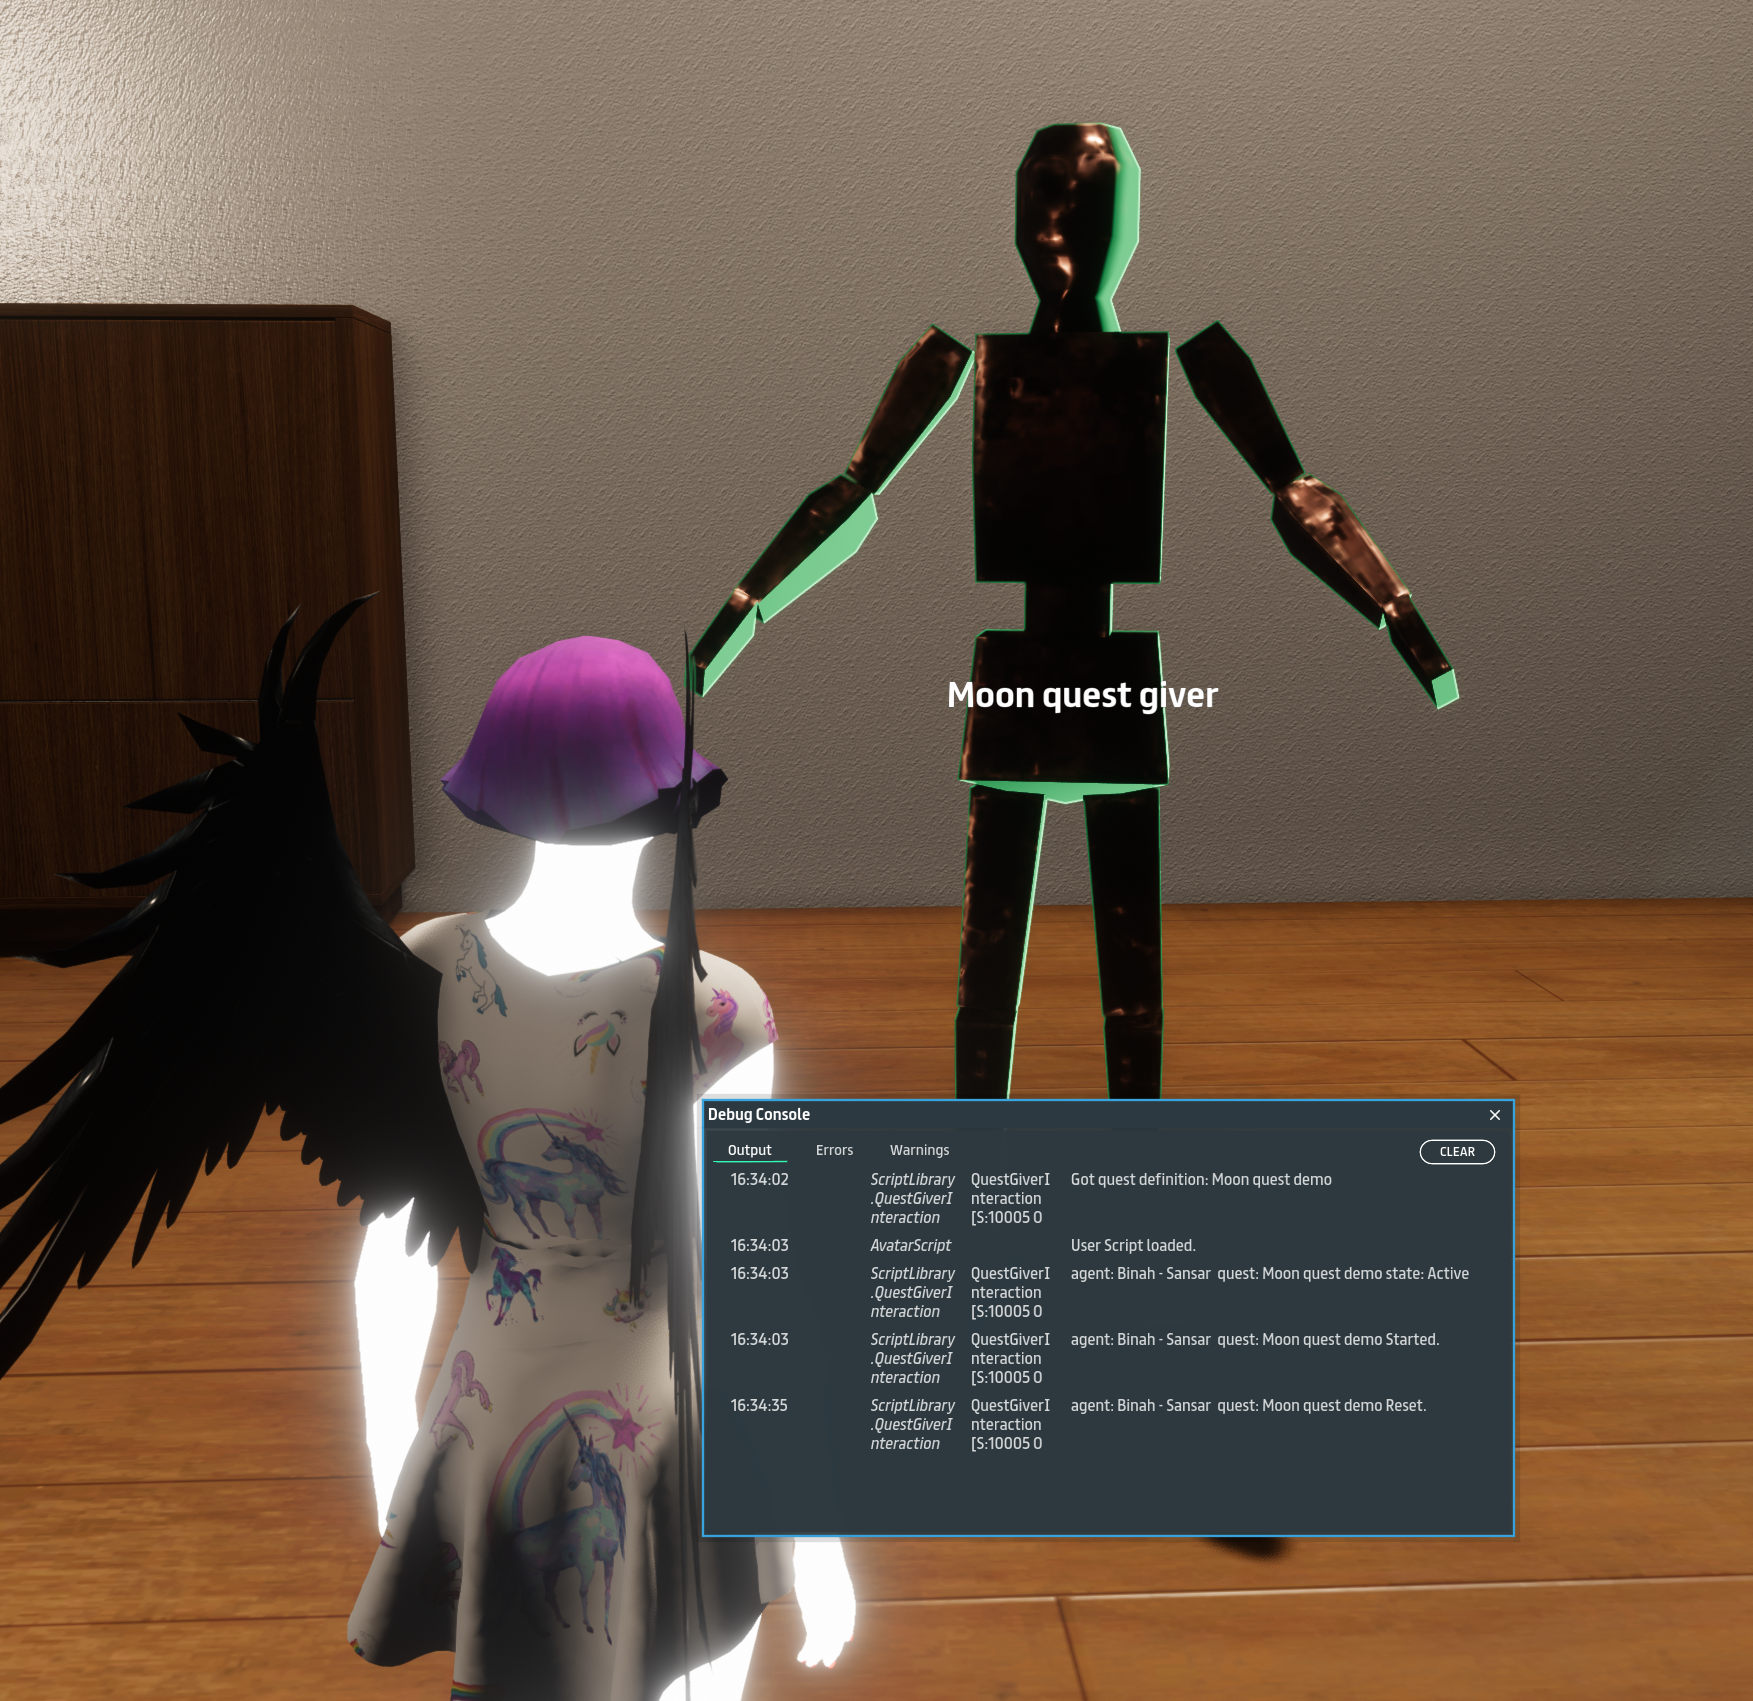
Once you have done that build and visit your scene. Open the debug console ctrl + d, you should see the debug output that “Got quest definition:..” and “User Script loaded.” events were sent to it. Now open up the quest player log or the creator and reset your quest progress. You should see the debug confirm that your agent has had the quest reset, and the quest giver should again offer the quest to you.
OBJECTIVES
Head back into edit mode for the demo scene and lets add the first objective.
Drag out the ‘Animated Push Button’ object and place it somewhere in your scene, in Properties make sure to set Is Scriptable to On
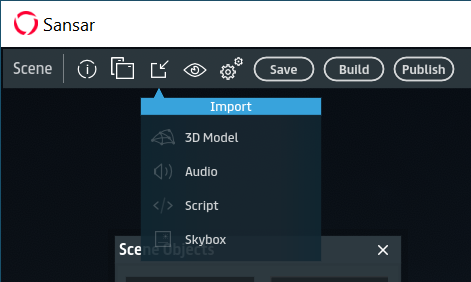
Upload LowerGravityAgentInteraction script from our github repository. Import the script into your scene from import menu in the top left corner of Sansar.
Add the LowerAgentGravity script to the ‘Animated Push Button’.
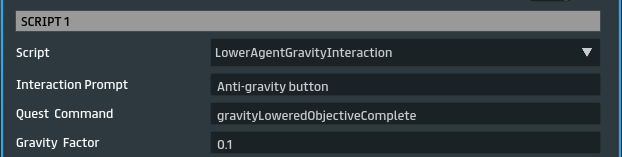
Open Properties panel and add an Interaction Prompt message Anti-gravity button, add the Quest Command, gravityLoweredObjectiveComplete, to send to the quest script api when a player completes this objective and set the Gravity Factor to 0.1 or leave the default value.
Let’s look into the script to see what it is doing. First thing we do is make our public declarations. We start with an Interaction object and provide a DefaultValue of “Click Me!” for the interaction text that will appear when a player approaches the object attached to the script.
using Sansar;
using Sansar.Script;
using Sansar.Simulation;
using System;

public class LowerAgentGravity : SceneObjectScript
{
    #region EditorProperties
    // An Interaction public property makes the script clickable.
    // This interaction will have a default prompt of "Click Me!"
    // Public fields show in the object properties after being added to a script.
    [DefaultValue("Click Me!")]
    public Interaction InteractionPrompt;
Next is another public property with a DisplayName to appear in the script properties panel of Quest Command, this is the command to be sent to the quest script api when this scripts objective is completed.
    [DisplayName("Quest Command")]
    public string questCommand;
Last public property is for the gravity factor to which the agent will be given after interacting with this script. Gravity range is 0.0G (no gravity) and 5.0 G (5 times Earth gravity)
    [DisplayName("Gravity Factor")]
    [DefaultValue(0.1f)]
    public readonly float gravityFactor = 0.1f;
    #endregion
Next we add the simple script compatible data structure so we can send the objective complete message to the quest scripts when the interactive object is clicked.
    public class SimpleData : Reflective
    {
        public SimpleData(ScriptBase script) { ExtraData = script; }
        public AgentInfo AgentInfo { get; set; }
        public ObjectId ObjectId { get; set; }
        public ObjectId SourceObjectId { get; set; }

        public Reflective ExtraData { get; }
    }

    SimpleData _simpleData = null;
Initialize the script and the private _simpleData member. Subscribe to the interaction event and register the callback function OnClick.
    // Init() is where the script is setup and is run when the script starts.
    public override void Init()
    {
        // initialize simple data object to send events to other scripts
        _simpleData = new SimpleData(this);

        // Subscribe to interaction events to do something when the object is clicked.
        InteractionPrompt.Subscribe(OnClick);
    }
The OnClick callback function finds the agent that initiated the click, and sets gravity for that agent to 0.1 gravity, and calls to the SendQuestevent function to send the command.
    public void OnClick(InteractionData data)
    {
        // Find the agent that clicked.
        AgentPrivate agent = ScenePrivate.FindAgent(data.AgentId);

        // Lower gravity for the agent that clicked
        agent.SetGravityFactor(gravityFactor);

        //Send the quest event
        SendQuestEvent(questCommand, agent);

    }
SendQuestEvent sends the simple script command using the _simpleData object to complete the objective gravityLoweredObjectiveComplete.
    void SendQuestEvent(string eventName, AgentPrivate agent)
    {
        if (agent != null)
        {
            //ObjectId and AgentInfo are used by other simple scripts to know who did it
            _simpleData.AgentInfo = agent.AgentInfo;
            _simpleData.ObjectId = agent.AgentInfo.ObjectId;
        }

        // Post script event
        PostScriptEvent(eventName, _simpleData);
    }
}
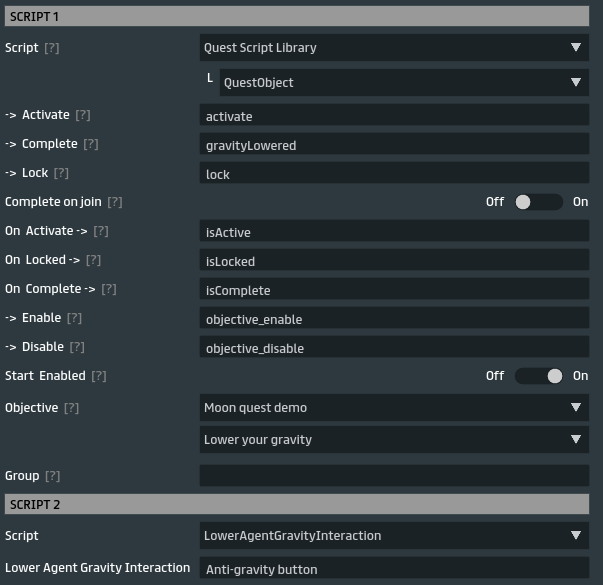
Add a Quest Script Library to the ‘Animated Push Button’ and choose QuestObject.
Quest object script will listen for the quest events defined in the inputs of this script and will send commands to quest API when the events are received. The only event we are going to be listening for is the Complete event, so enter the command that we set in the LowerAgentGravityInteraction script, gravityLoweredObjectiveComplete, to be sent when the user has successfully found the gravity button and completed the objective.
Don’t forget to choose your quest and the objective that the script on this object will complete, Lower your gravity.
Build and test completing your first objective, if you haven’t already, reset your quest progress before testing, it’s usually best to do this before you enter your experience.
Drag out the ‘Moon’ object and place somewhere high over head.
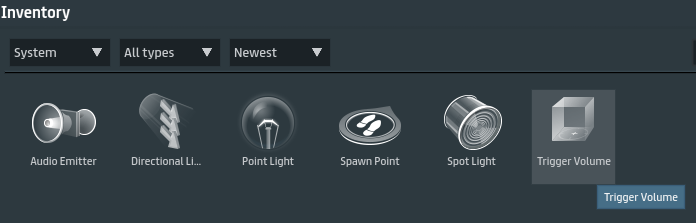
Add a Trigger Volume to the moon’s top side. A Trigger Volume is an object that has volume and triggers an event when collision is detected, you can find them in your inventory under System.
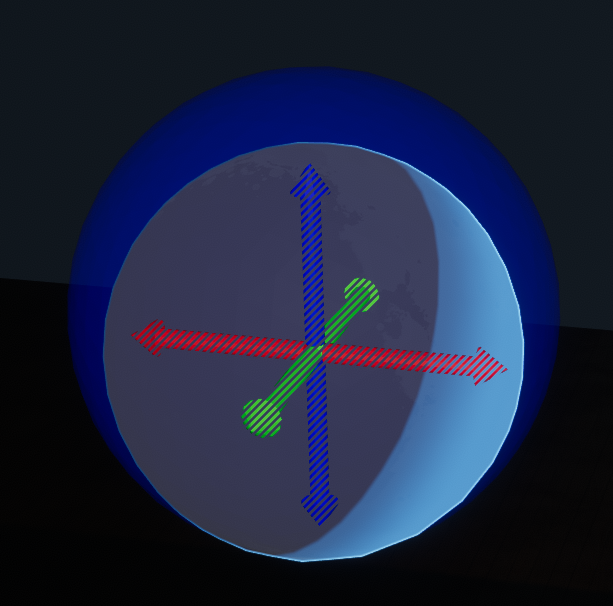
In the Trigger Volume Properties set Volume Type to Sphere, set Movable From Script to On.
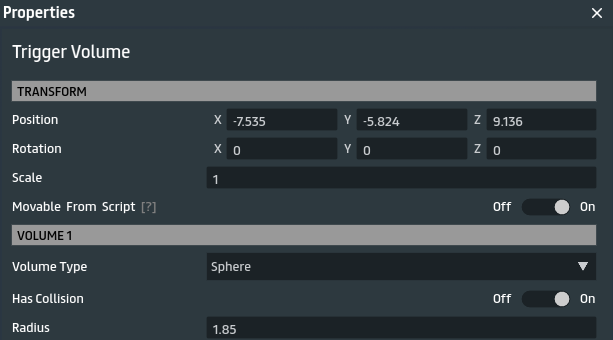
Try to size and position the trigger volume so that it will only be triggered when an agent lands on the moon.
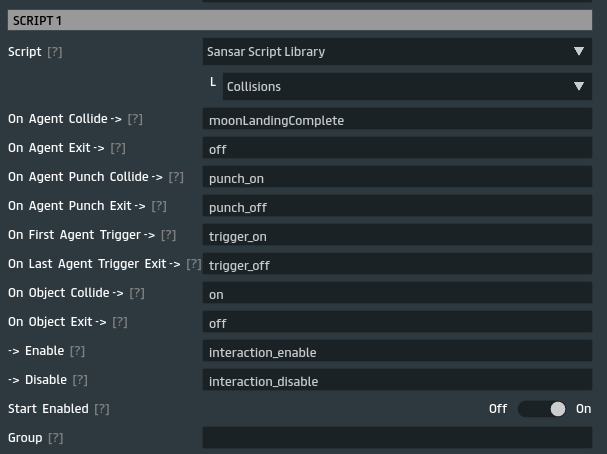
Add a script to the Trigger Volume, select Sansar Script Library and Collisions type. We want to send the moonLandingComplete command when a player collides, i.e. “lands”, add moonLandingComplete to the On Agent Collide inout
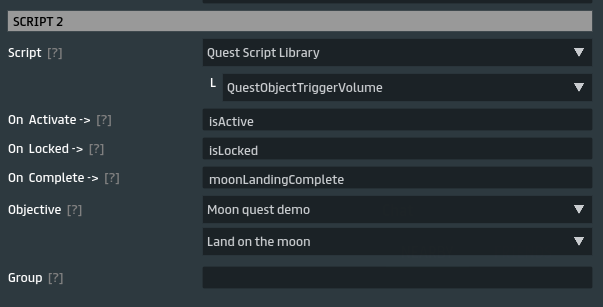
Add another script this time from the Quest Script Library and QuestObjectTriggerVolume type. Add a listener for the command moonLandingComplete on the On Complete input, this event will be sent from the collision script and will trigger the quest script to send the objective complete event to the quest script api.Don’t forget to select your quest and the objective which this script will complete Land on the moon.
Build and test your next objective if you run into issues don’t forget to use the debug console to see what events are being sent to the quest system. (Don’t forget you’ll need to turn off your avatar’s gravity to land on the moon )
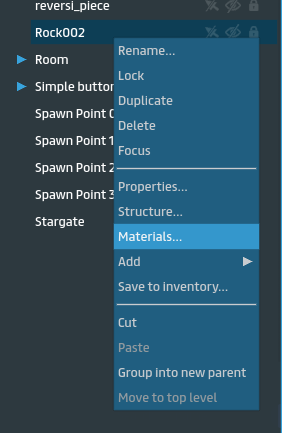
The final objective will be to collect a moon rock, so drag ‘Rock002’ to some place on the moon’s surface and adjust Scale to about 0.25 and set Is Scriptable to On. I also adjusted the Materials to add an emmissive glow to match the moon. You can open the Materials panel by right clicking the object in world or in the Scene Objects panel and choosing Materials.
Change the Shader dropdown from Standard + Alpha mask to Standard + Emissive.
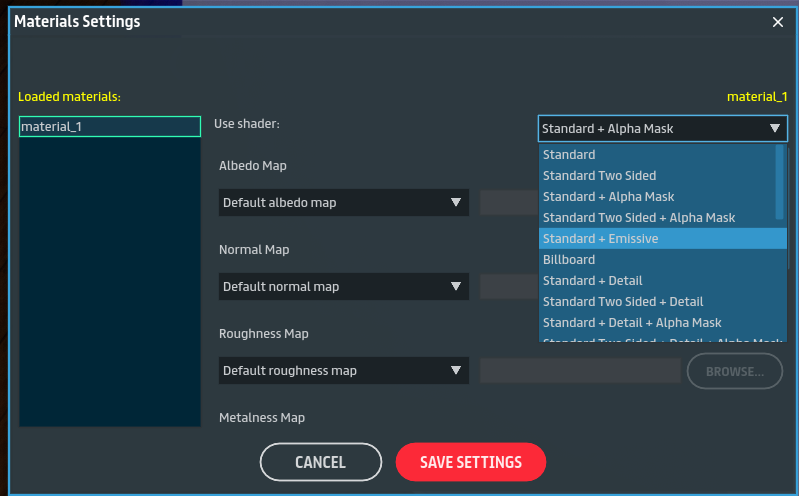
And then turn down the emissive intensity to about 0.25.

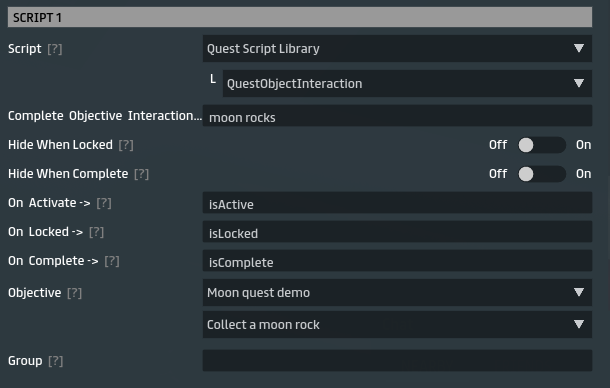
Add a Quest Script Library script to ‘Rock002’ and choose QuestObjectInteraction, choose your quest and the objective this script its to complete. The script will send the isComplete command to complete the objective when the rocks are clicked. Change the Complete objective Interaction text to something like moon rocks.
Build and test your quest.Since this is the final objective your quest will end an the completion dialog will congratulate the player on succeeding.
Now that you have all the basic building blocks to make your own quests, go forth and quest all the things!