We’re going to be looking at the Gun Scripts and then modifying the example Pew Pew script to make a shooting gallery.
The following assets are being used in the post
- Revolver Firearm Gun
- Military Target
- Breaking Bottle (customizable)
- Simple Animation with Auto Reset Script
- Hits and impact sounds from fesliyanstudios.com
- Shooting sounds from soundbible.com
Guns
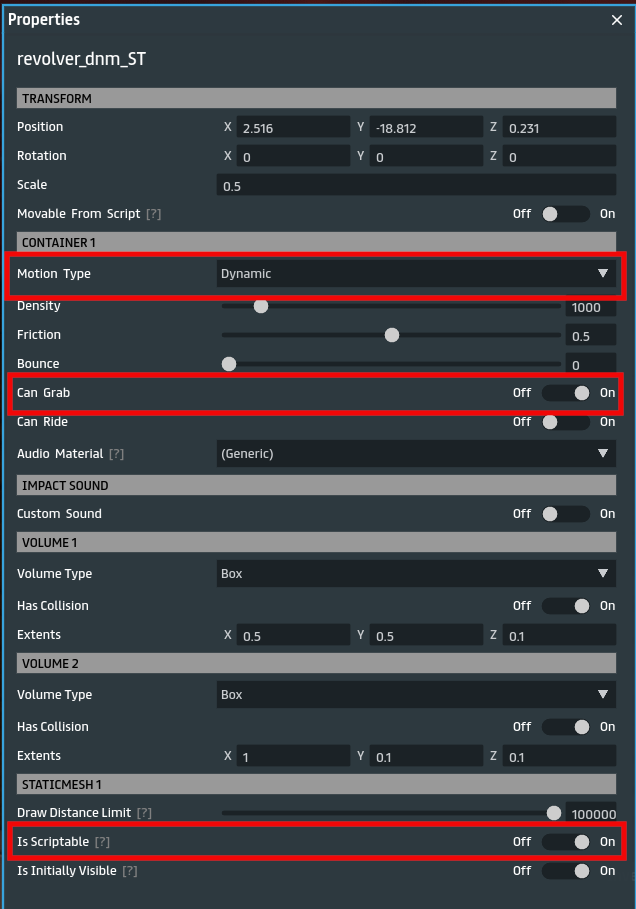
First things first, grab a gun, place it in your scene. Set the following toggles:
note: if you do not see a Motion Type setting for your gun you do not have a gun with a collision layer.
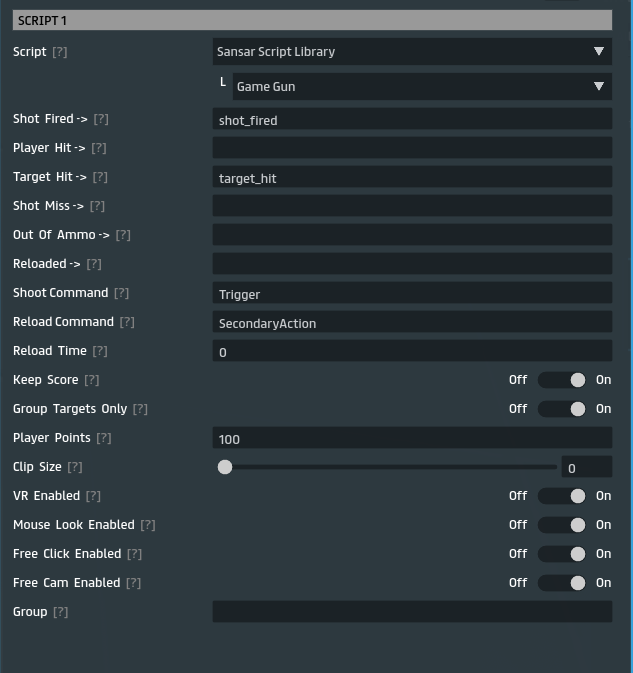
Add a Game Gun script from the Sansar Script Library to the gun, add a shot_fired and target_hit event, also set the clip size to 0 for infinite shots.
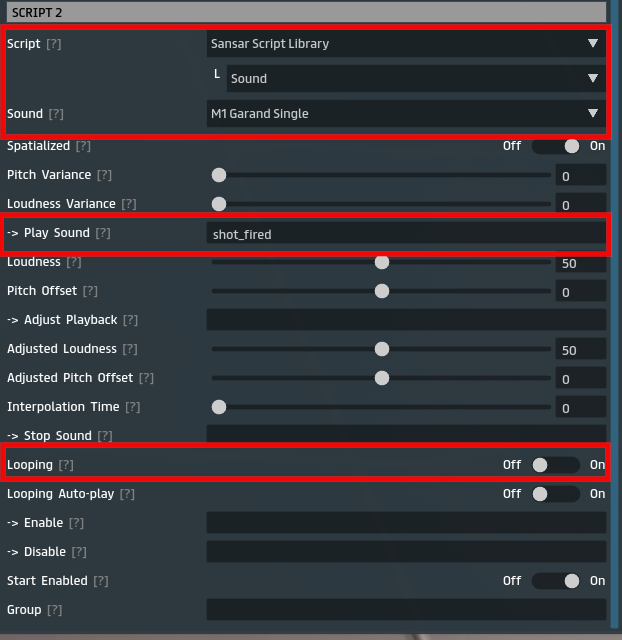
Add another Sansar Script Library script, Sound, for playing the gun shot sound. Link an audio clip and add the shot_fired event.
Build the scene and visit. If you are in desktop mode you will notice that you can pick up the gun and shoot with the left mouse button but as soon as you do you also drop the gun. If you are in VR you will notice how you can pick up the gun and shoot without dropping it but your hands can hold the gun awkward ways. In order to fix both desktop and VR you can add Grab Points to the gun which allow you to position how the object should be held when grabbed as well as toggling Stay in Hand for desktop mode so the gun does not drop when the trigger is pulled.
Right click the object and choose Add > Grab Points
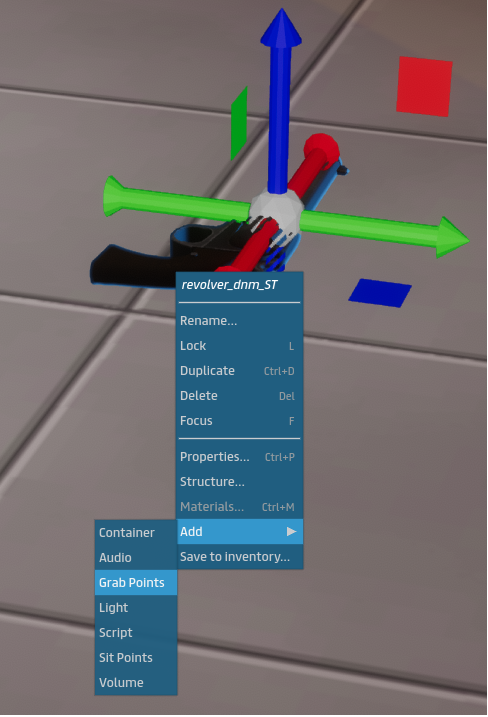
You should now see a set of hands positioned somewhere on the object, its very likely the hands will not be on the gun grip and you will need to position and adjust them to hold the gun naturally.
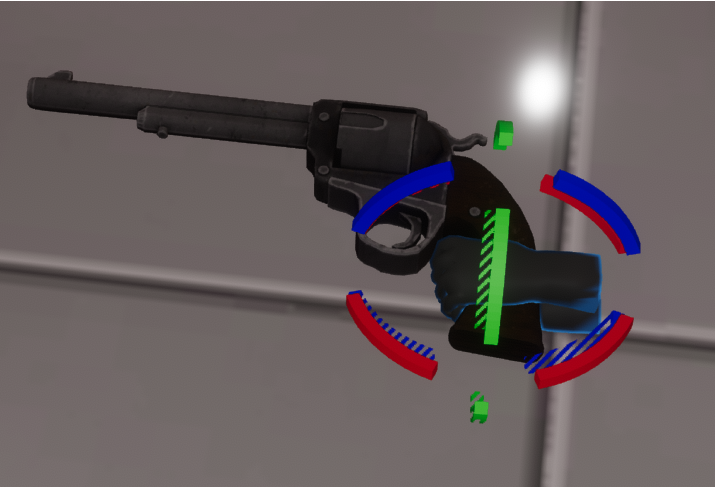
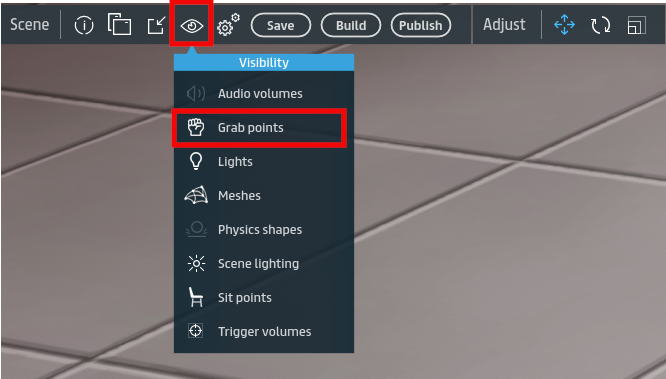
If you don’t see the hands you may need to set the visibility of Grab Points in the top left Visibility menu as shown.
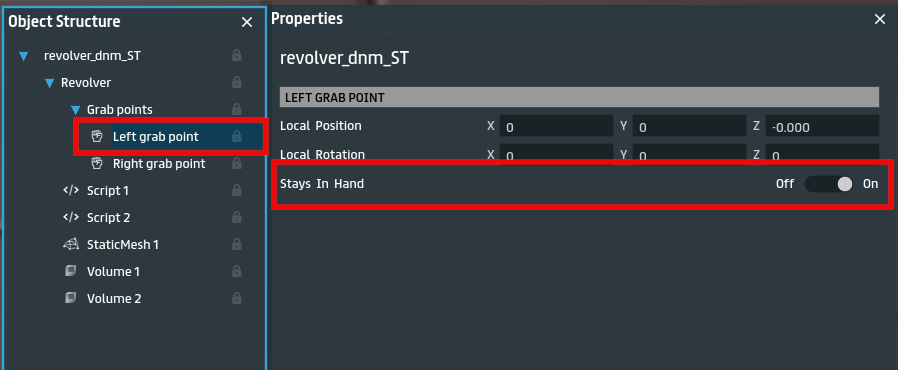
In the Object Structure panel select the left and right grab points individually to set the Stay In Hand toggle to On in the Properties panel.
Build and revisit and now you will see in both desktop and VR you do not drop the gun when firing. Although when in desktop mode it is not easy to tell where you are shooting. The fact is you shoot whatever your mouse is pointed at, essentially you are clicking on a thing to shoot it. The fact that the arms stay at your side in desktop is also confusing, I don’t have a way to fix the arms at side issue but we can up the game for shooting by toggling the Free Click Enabled to Off
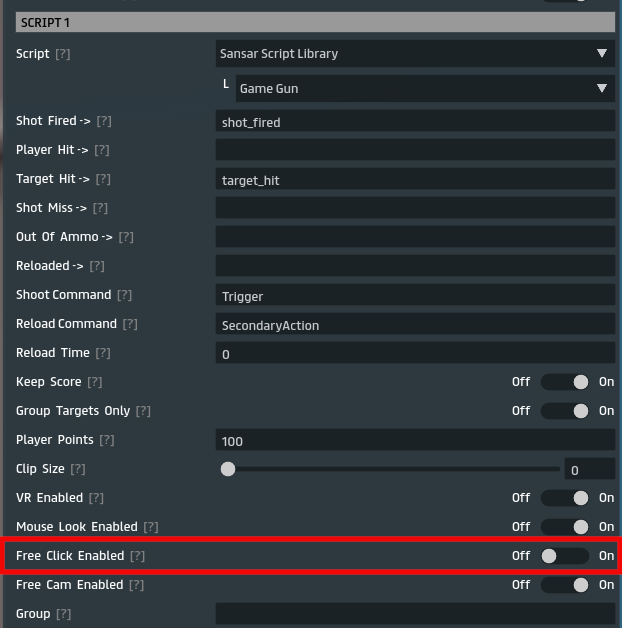
When Free Click Enabled is Off and you try to click to shoot with the settings above you will get a warning in chat from the System telling the player that they have to be in Mouse Look in order to shoot.

Mouse Look mode is a toggle on the escape key which turns your mouse cursor into a circular reticle you can use for aiming.
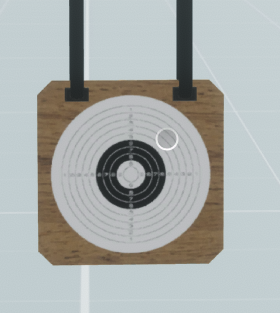
Targets
Drag out a target, make sure Has Collision and Is Scriptable are both toggled to On.
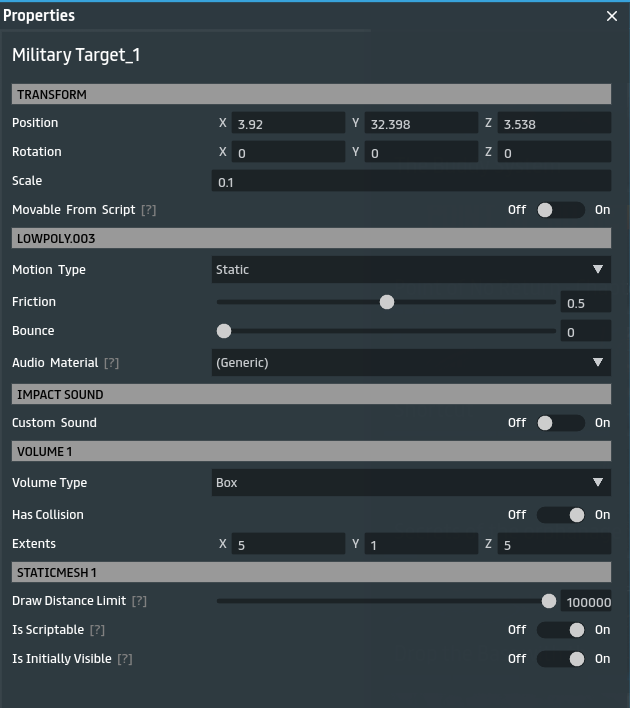
Add a Game Target script and a Sound script from the Sansar Script Library
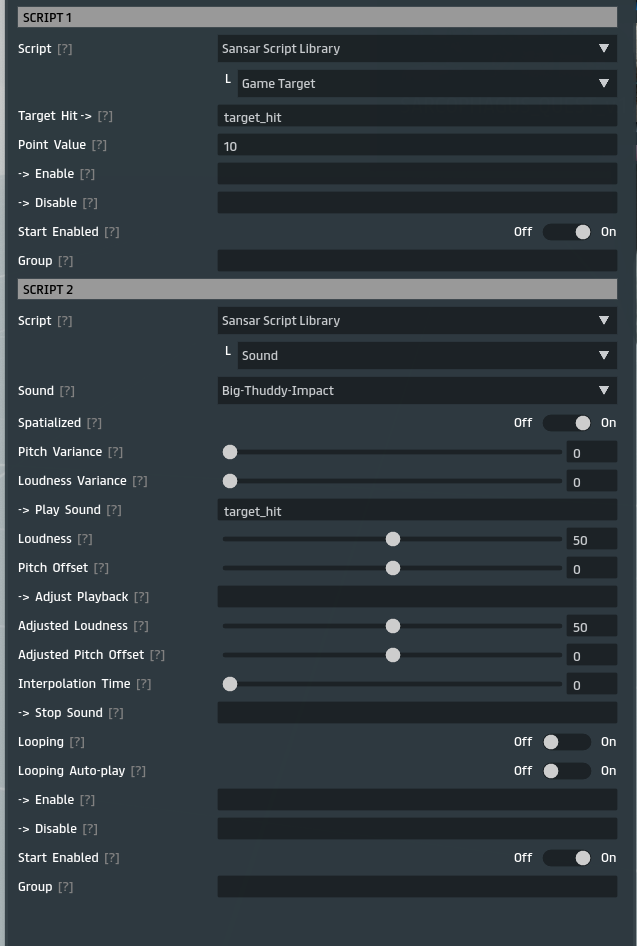
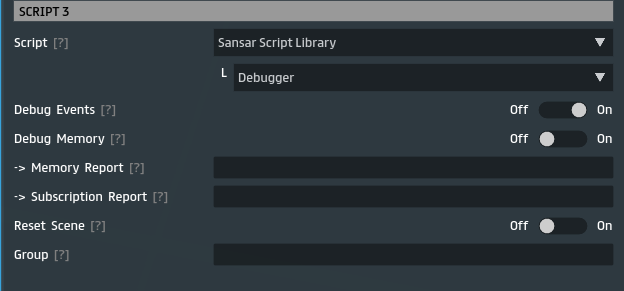
Build and shoot the target, you should hear both a gun fire and a hit sound when you make a shot. If for some reason you don’t hear anything don’t forget you can always add Debugger scripts from the Sansar Script Library to log events.
Pew Pew Example Script
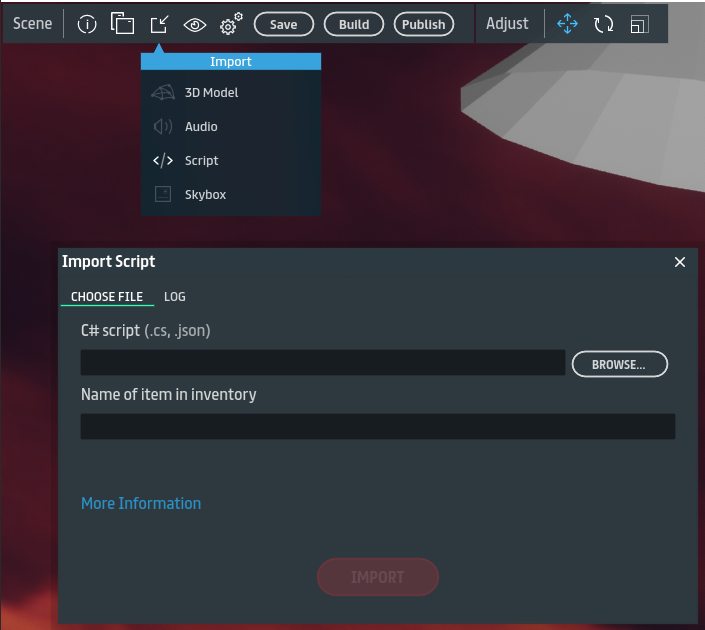
The Pew Pew Example script does many of the things we just did with a single script. Download the script and then import it into your scene.
Remove both scripts on gun the gun and replace with the PewPewExample script and choose the PewPewExample.Gun option.
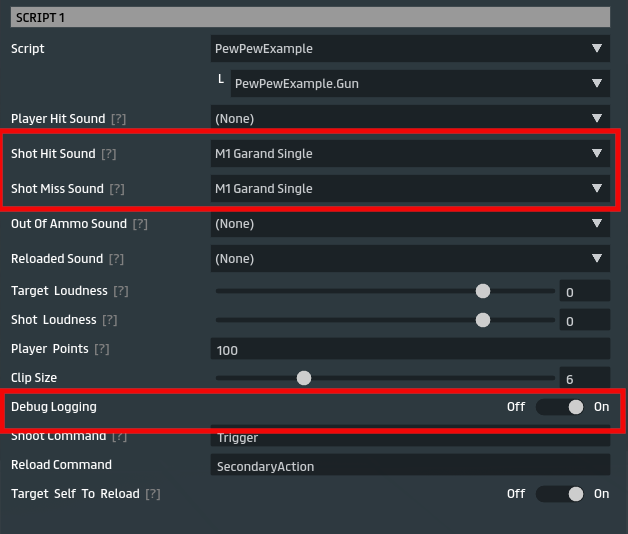
The Pew Pew Example script has a lot of the same functionality as the the Game Gun script with some nice extras like having sound effects play when players and targets are hit and built in debugging with a toggle. Although I didn’t quite understand the difference between the Shot Hit Sound and the Shot Miss Sound as both sounds to me would just be the same gun shot sound so I just used the same sound twice.
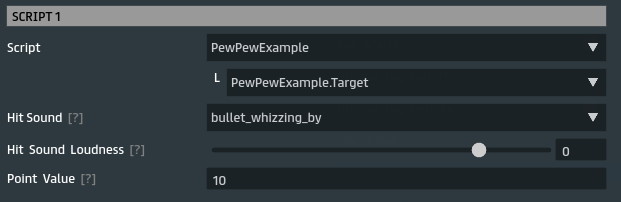
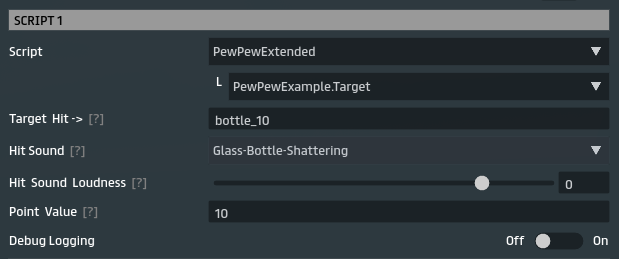
Do the same and remove the scripts from the target as well. The target is simple, it has a hit sound to play a Loudness and a point value when the target is hit.
Build and test, it should function almost the same as we had before, but not exactly…the things I found missing were
- the ability to restrict
Free Clickmode, forcing the use ofMouse Lookfor desktop aiming - the infinite clip when using
0as clip size - the ability to send a Target Hit event, which can be used to trigger animations as we’ll demonstrate later
- the
Targetclass doesn’t have any debug logging
I also did not understand the Shot Hit/Shot Miss sounds, to me it seems like one sound for when a shot is fired and a completely different sound for when a shot is missed and leave the shot hit sound up to the target, maybe that was the intention here but the labelling is not clear so I’d like to change that as well.

As an added bonus we’ll also be adding some actions when a player is hit ….
Extend Pew Pew Script
Shot Sound
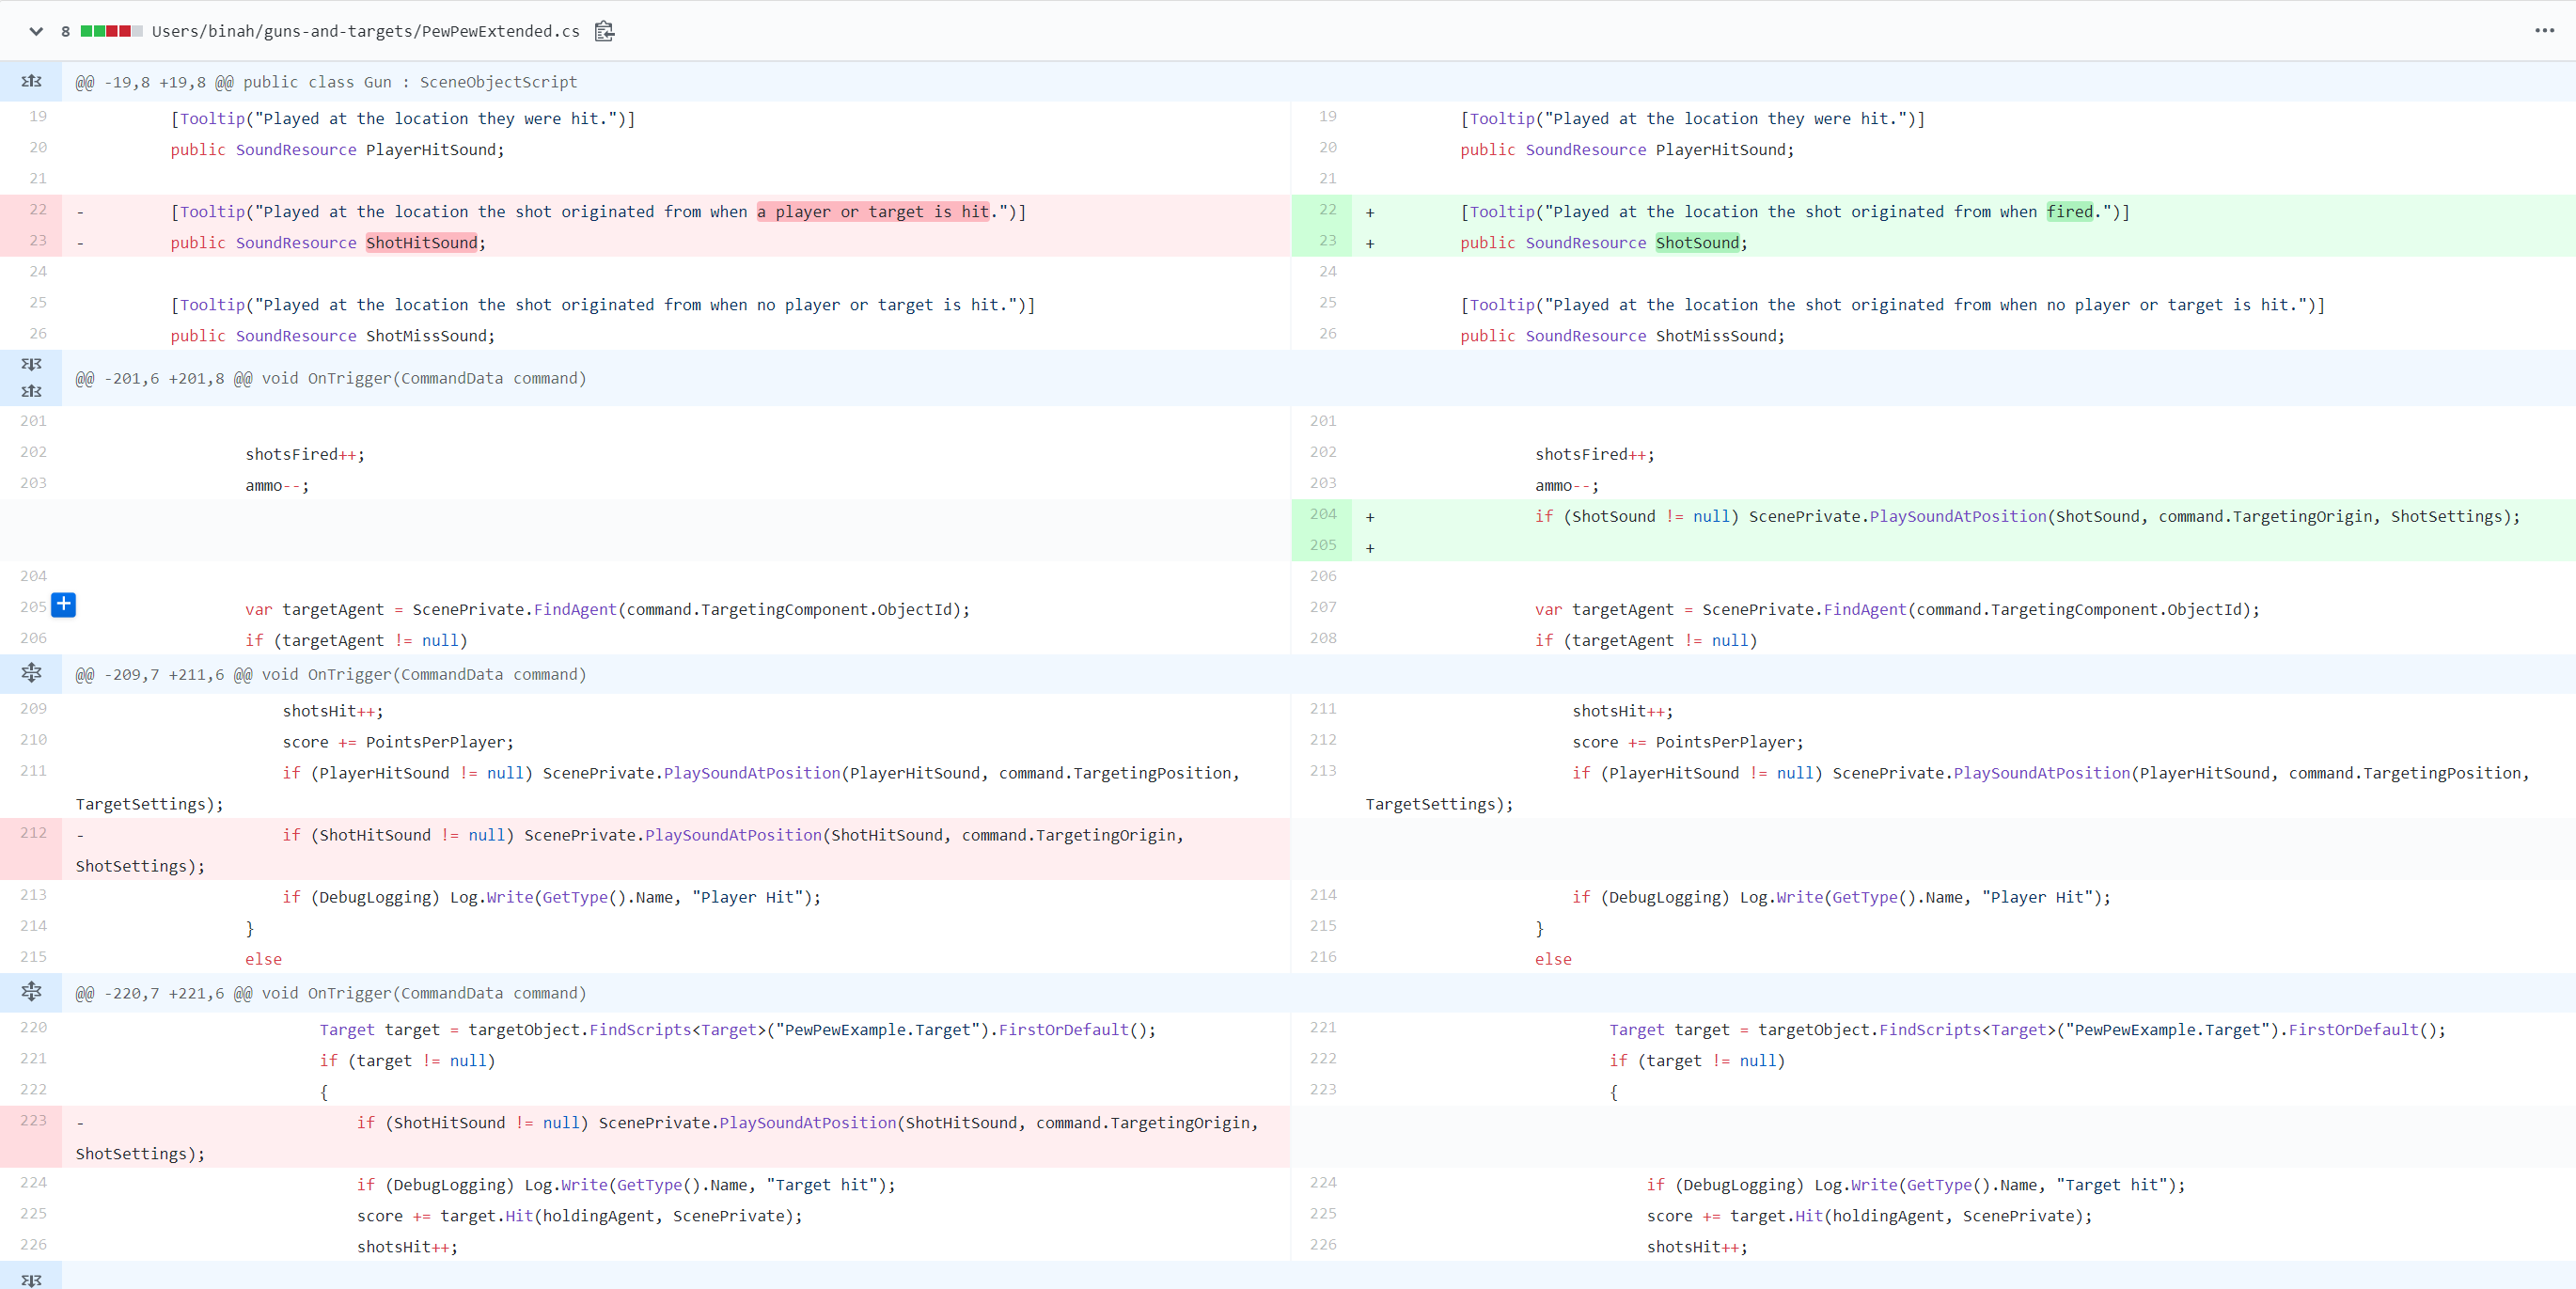
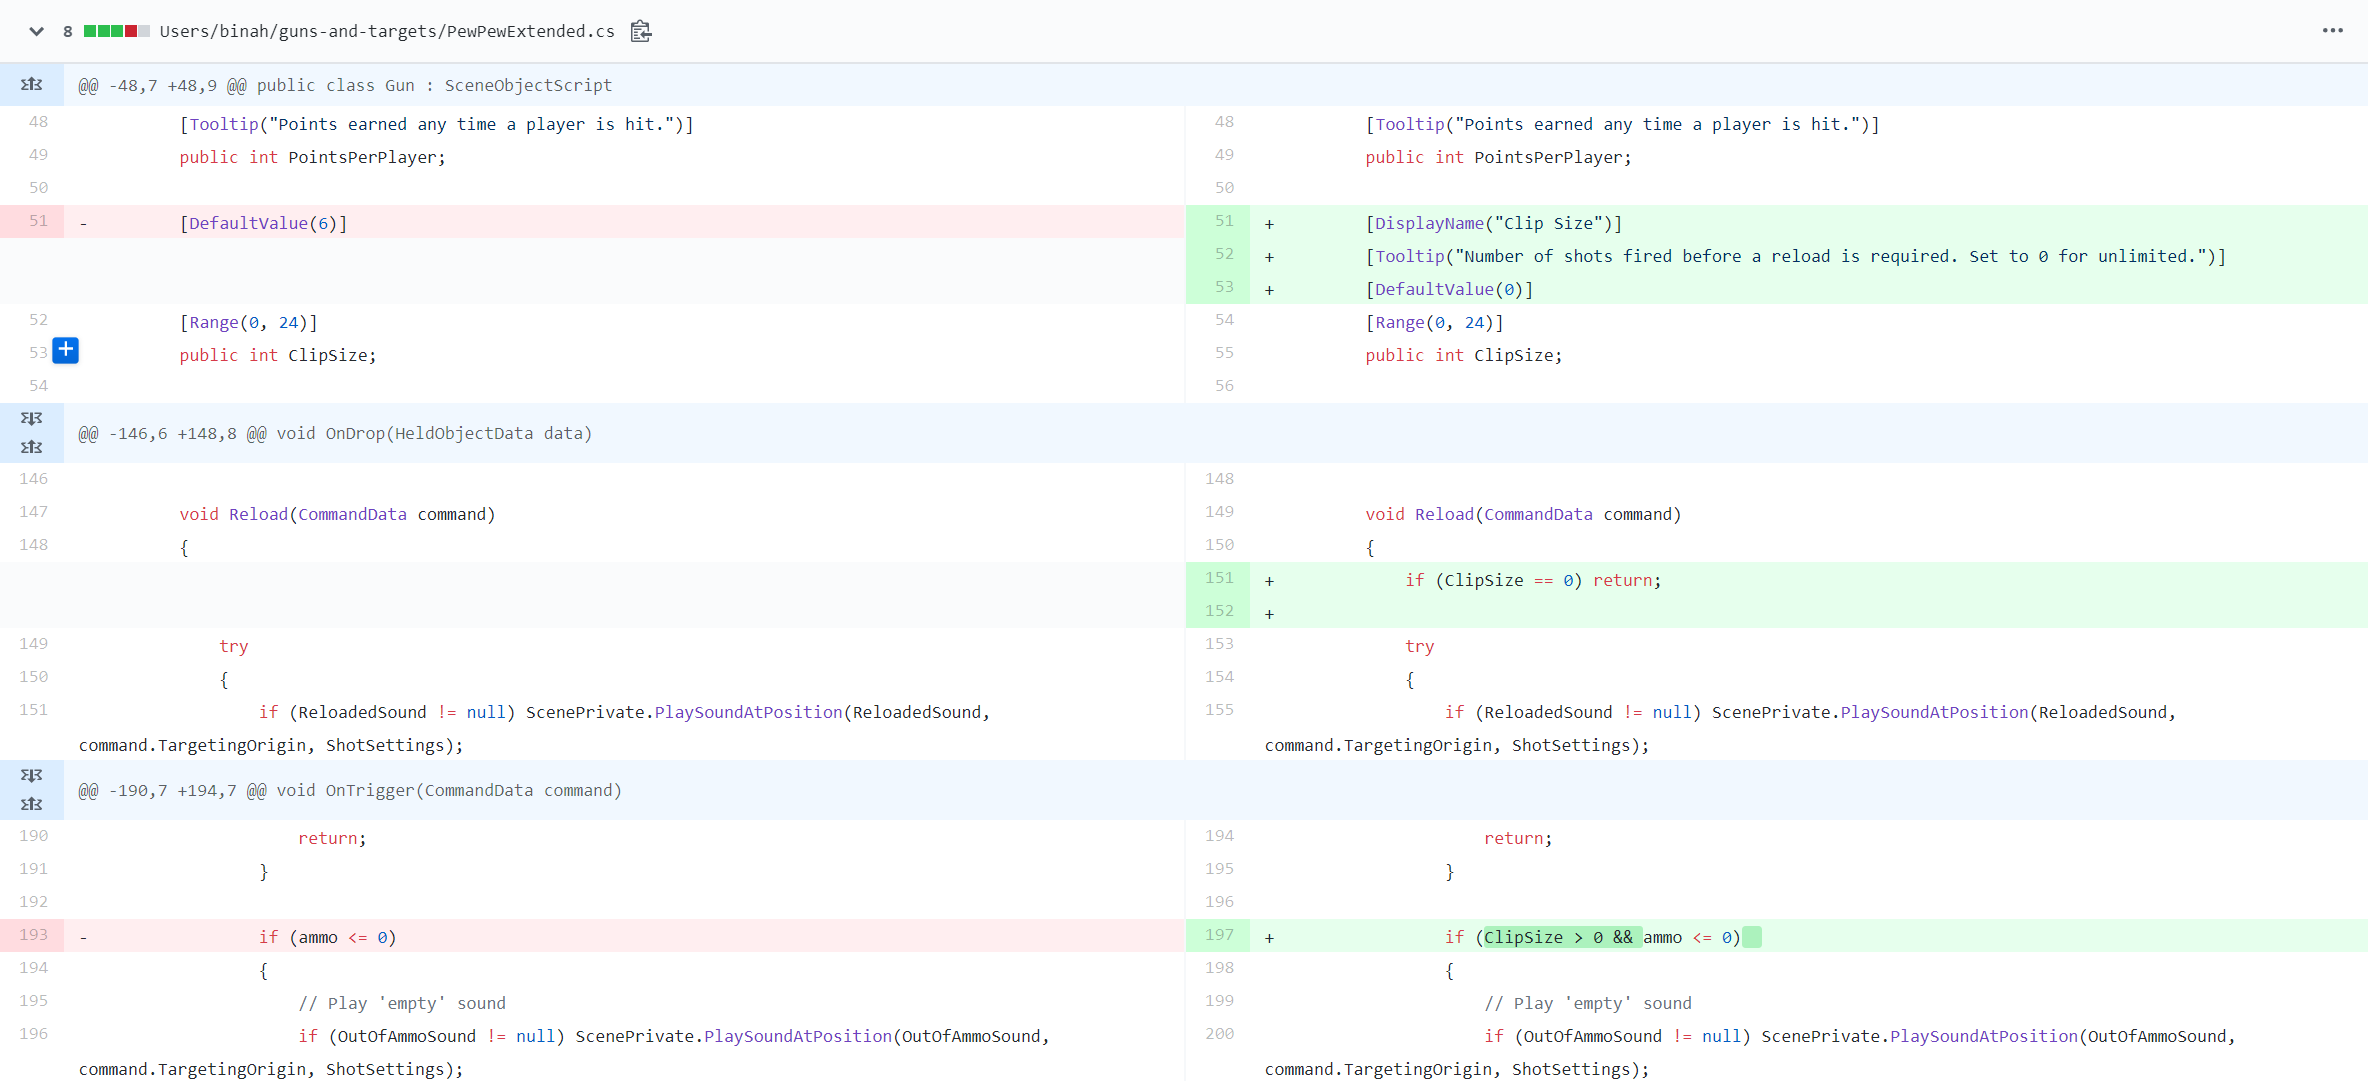
Starting off with the PewPewExample.cs the first thing I’d like to change are the confusing sound inputs. Replace ShotHitSound with a more generic ShotSound and up date the tooltip to reflect the fact that it wil play when a shot is fired.
Find the two places the deleted variable is used in the OnTrigger methods, both lines which use the variable are identical, they play the sound assigned to ShotHitSound copy one of the lines and then delete both lines that use the ShotHitSound variable. Instead we want to play the sound each time the OnTrigger is called regardless if the shot hits the target or not,paste that line following the shotsFired++ increment and ammo-- decrement and update the ShotHitSound variable to ShoutSound.
Infinite Clip
Next lets re-enable infinite clip size with a value of 0. Update the tooltip and set the default value to zero.
Inside the Reload method add an if statement that checks for the value of 0 in ClipSize and if so return out out of the function.
In the OnTrigger method find where the ammo check happens and add another clause to the if statement ensuring that ClipSize is greater than 0.
Disable Free Click
Now lets disable the ability to Free Click on the desktop to fire the gun, and enforce the use of Mouse Look to aim and fire.
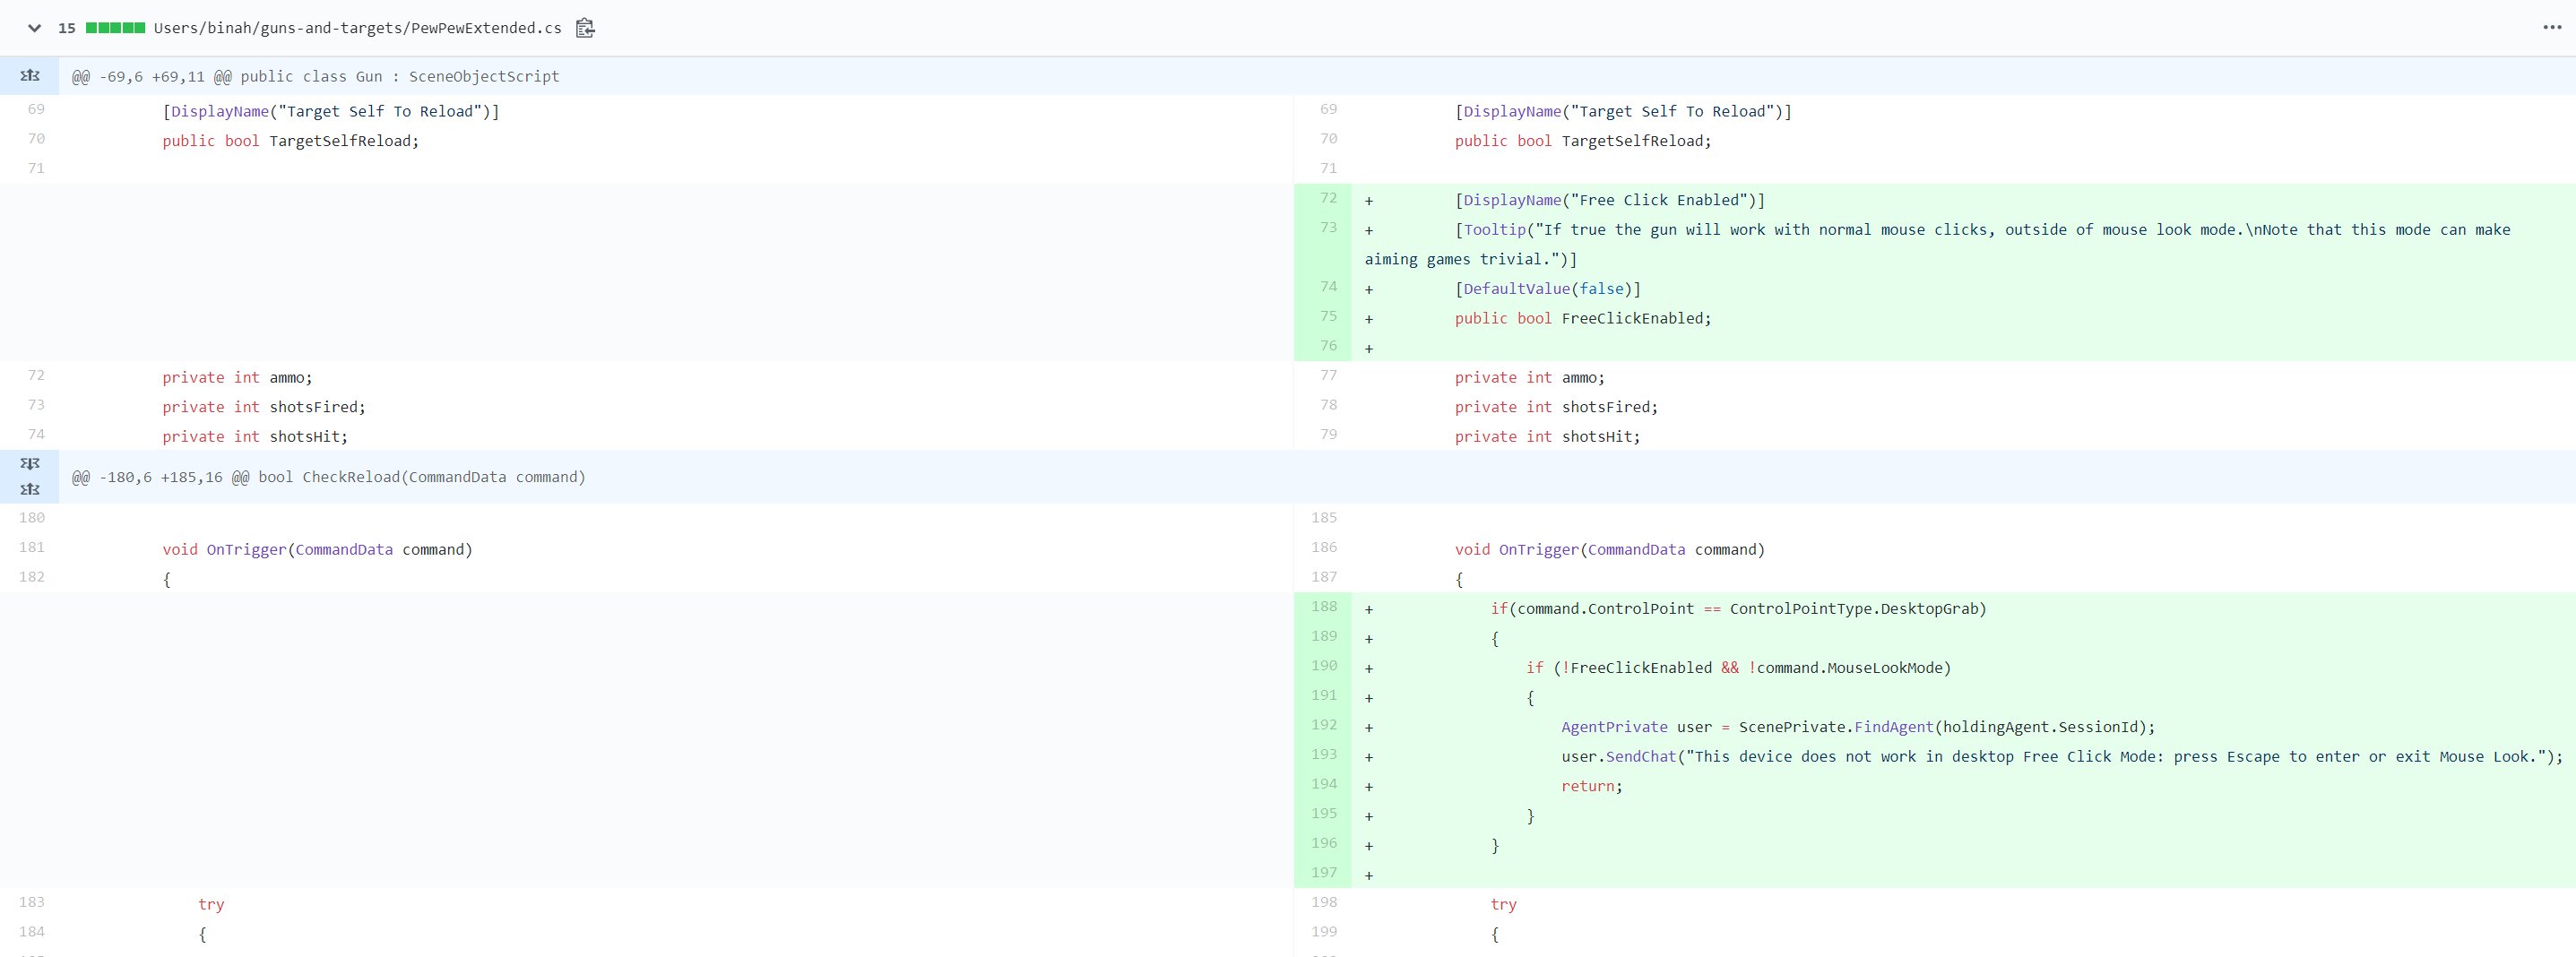
Start by adding a public configurable property for FreeClickEnabled and default it to false.
Command Data is sent when an input event occurs, and it sends with it a Control Point Type, an enum type that include DesktopGrab and LeftTool and RightTool for VR, as possible values.
In the OnTrigger method you will want to add a check for which ControlPointType is passed through CommandData and do a check on the type. If the type is DesktopGrab then do a check if FreeClickEnabled is false, if it is also check that MouseLookMode is enabled before allowing execution to continue, if it is not send a message to the user through chat telling them they must be on Mouse Look mode to use the gun.
Hit Event
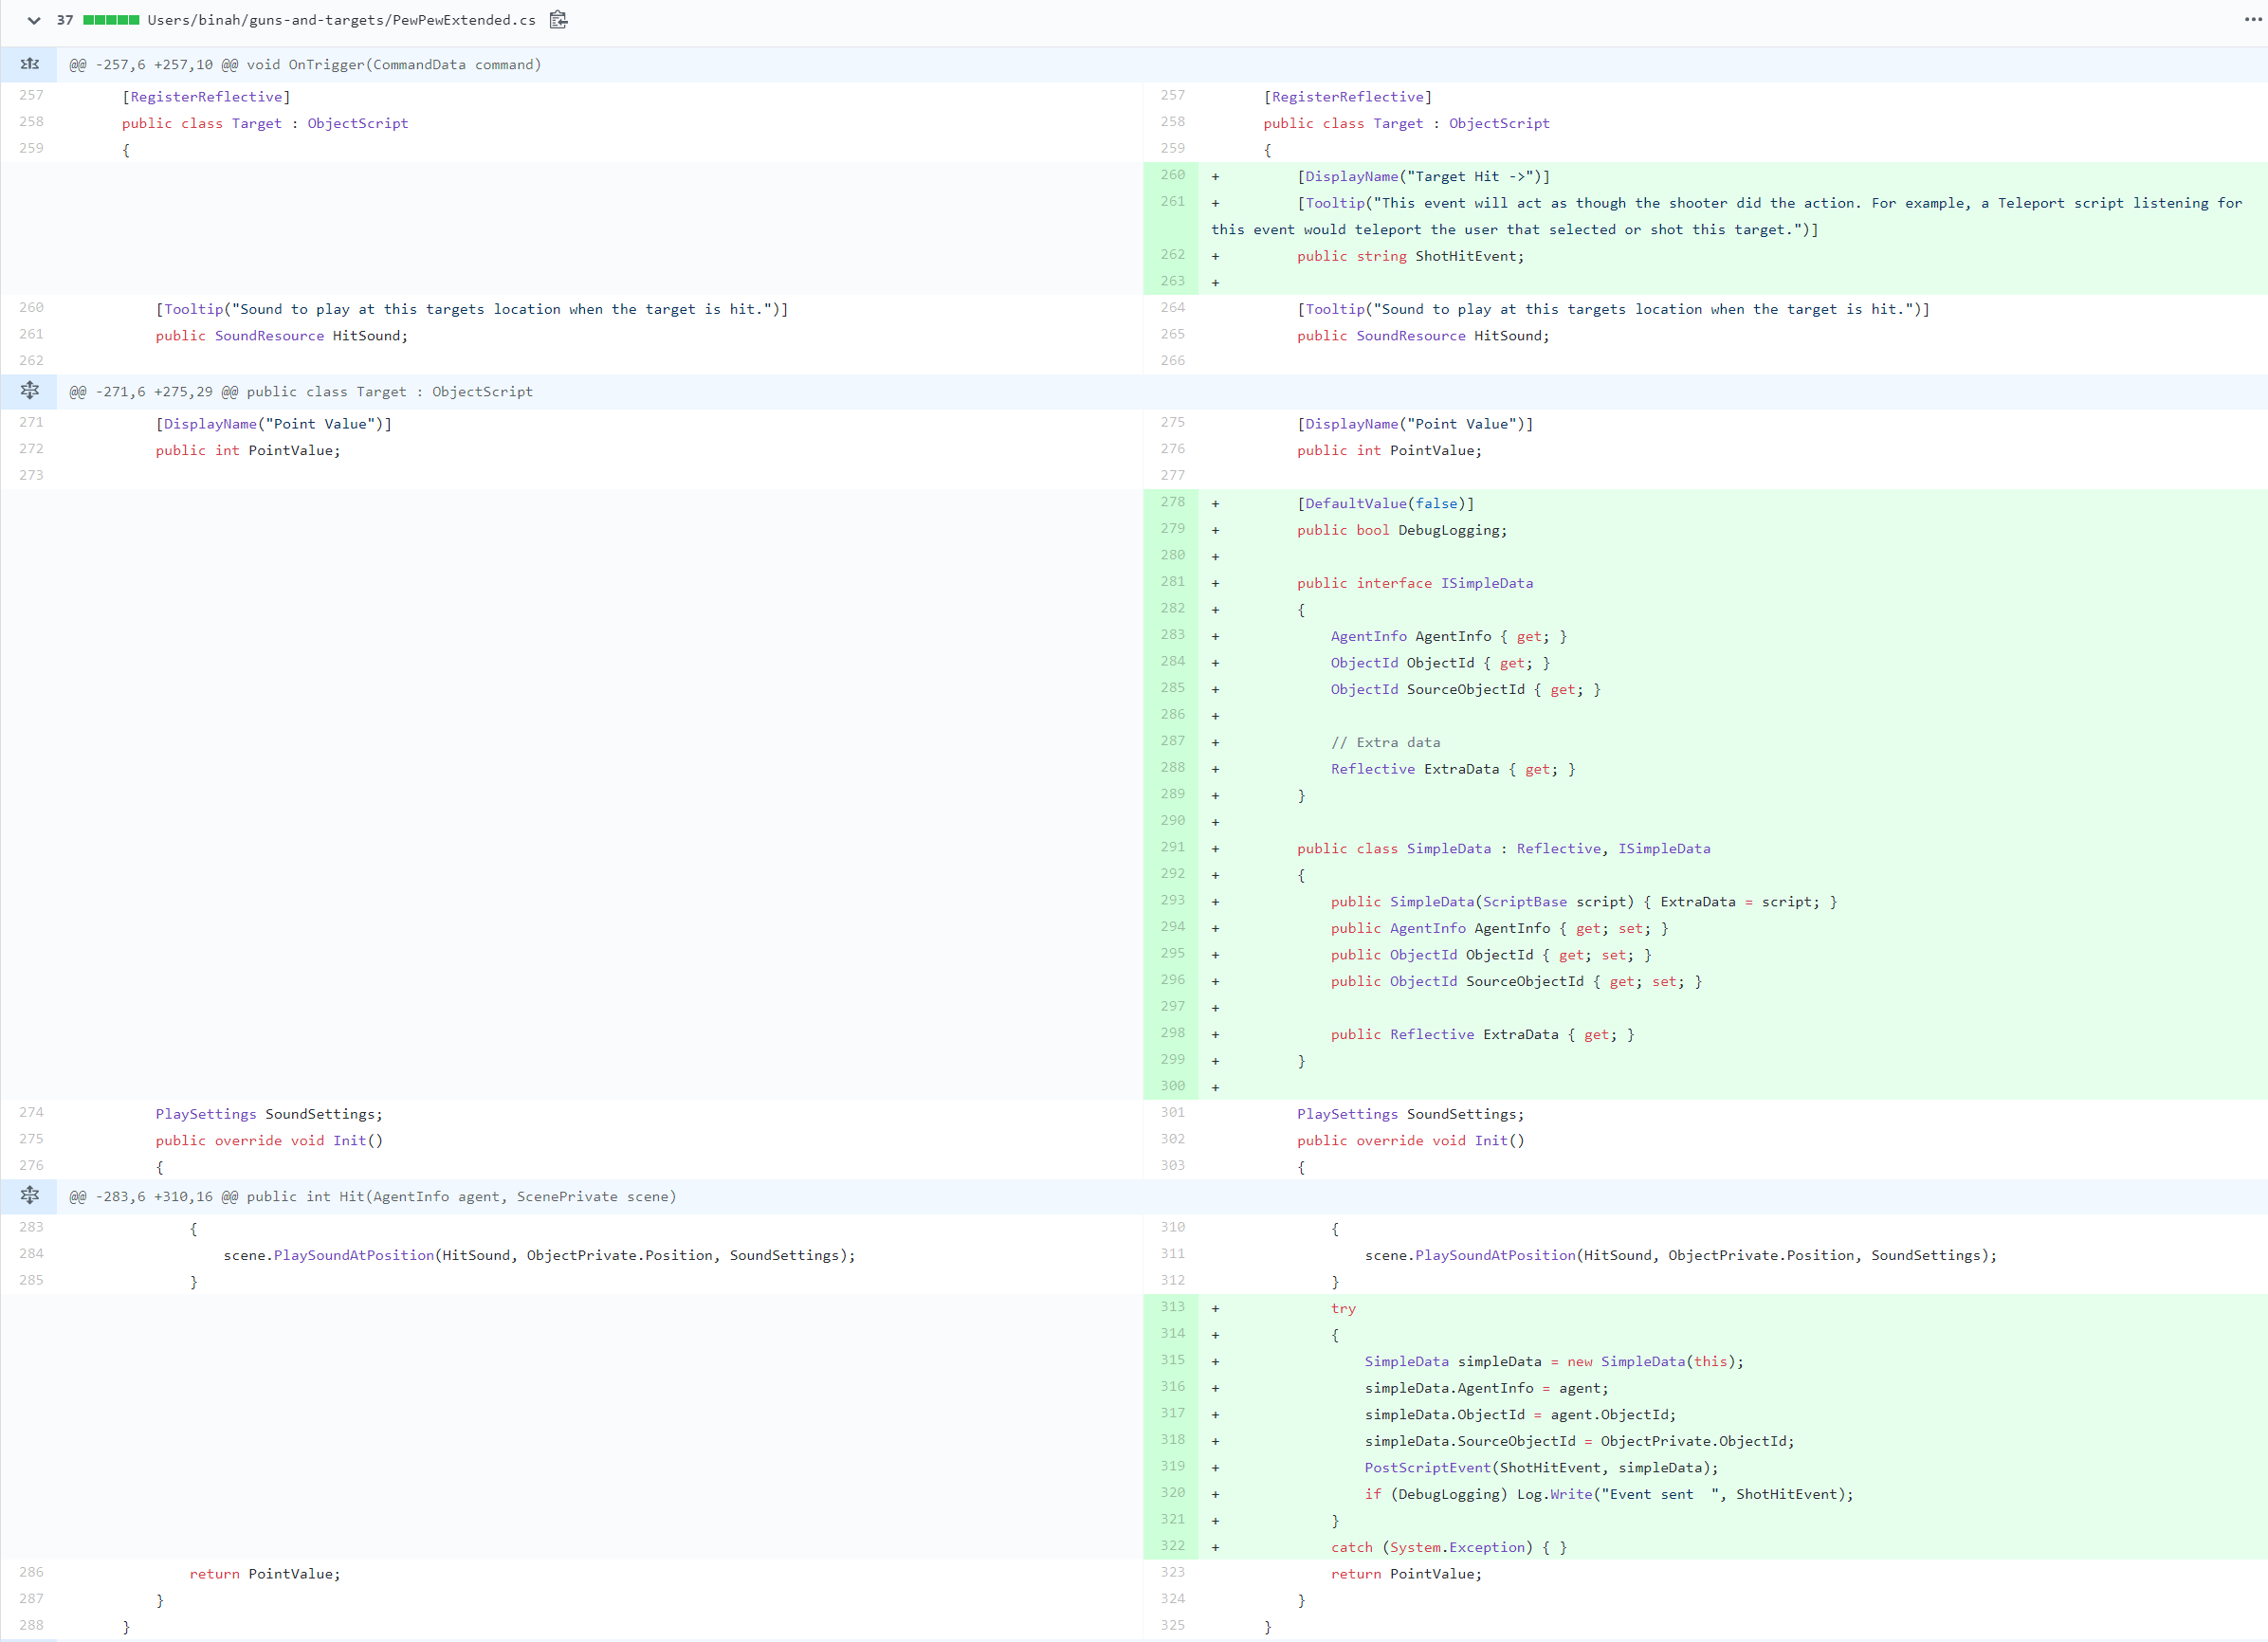
Let’s add a ShotHitEvent when a target has been hit to do things like trigger animations through simple scripts.
Add a public property and tooltip for ShotHitEvent in the Target class. Also add one for DebugLogging.
Add the simple script interface to the Target class. In the Hit method compose and send that event, along with a debug log.
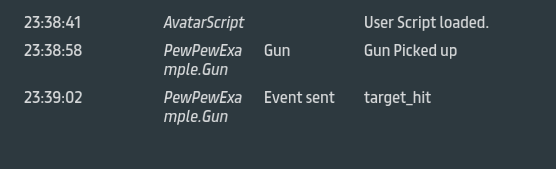
Build and visit, open up the debug panel and shoot your target.
Build a shooting gallery
Now that we have our script doing all the things we want it to do, lets put it all together and make a simple shooting gallery.
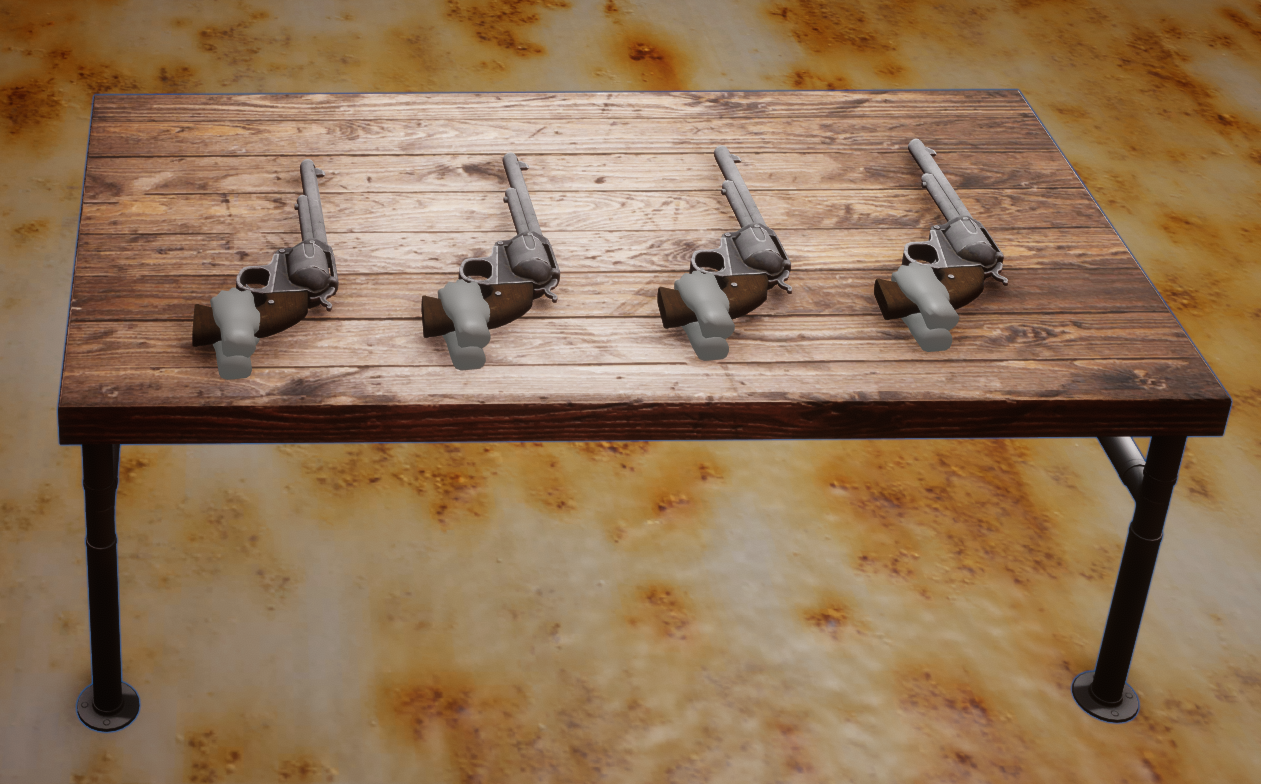
Lets start by adding Shot Miss Sound to the gun. Once you have the gun set up the way you like it, place it in world to be picked, duplicate as many guns as you want to have in your gallery.
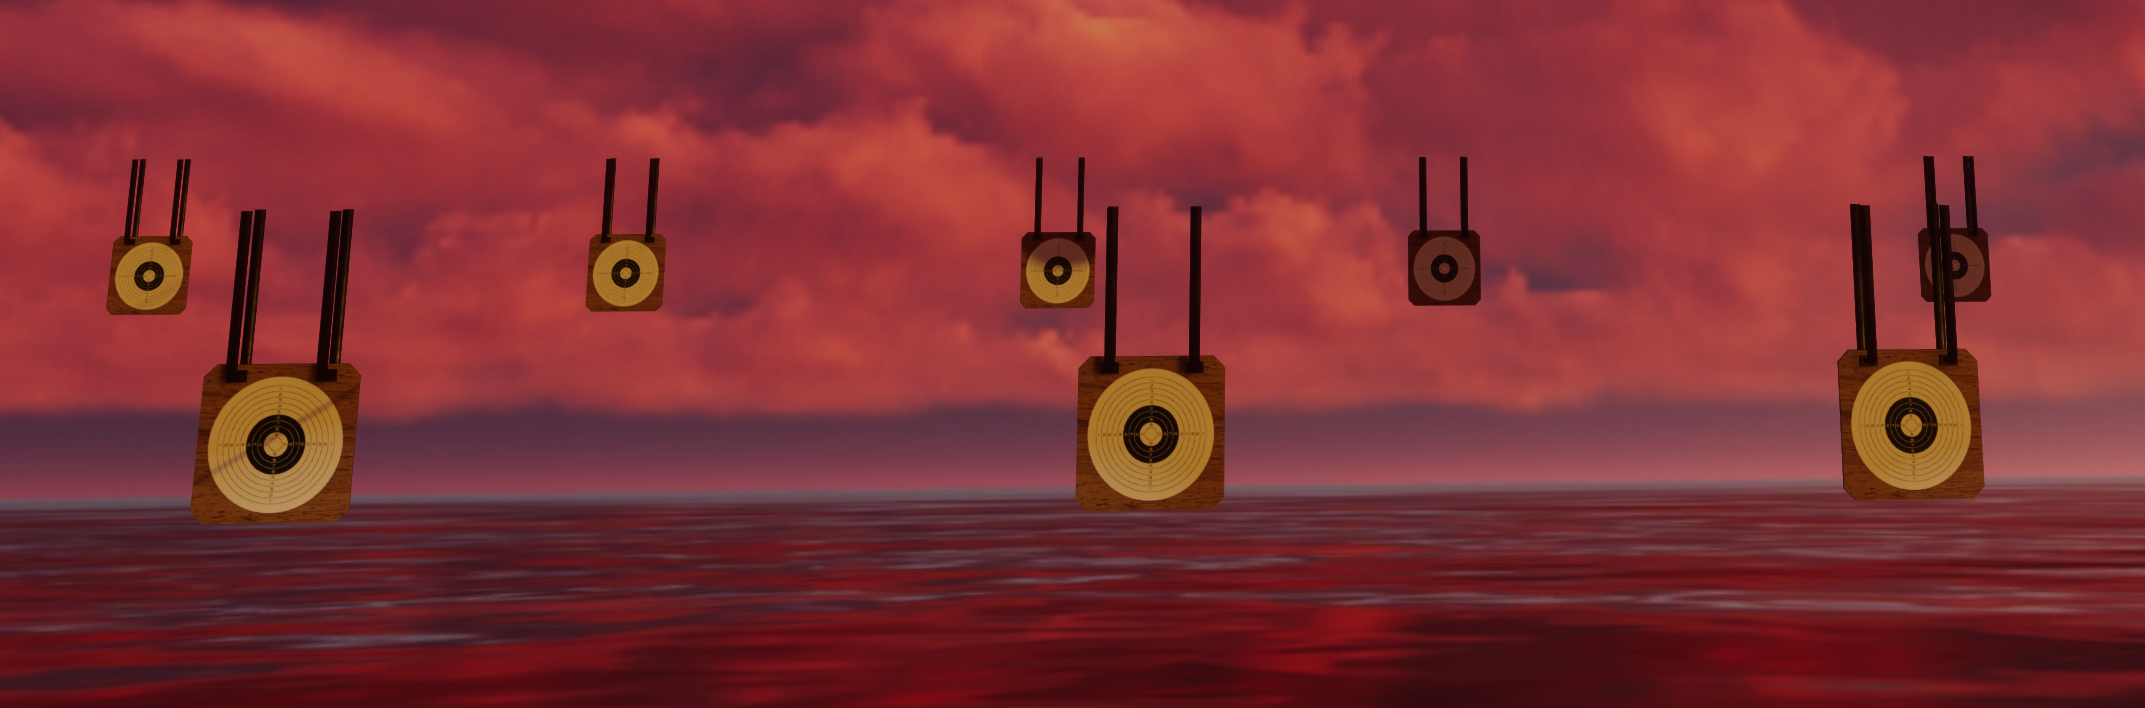
Do the same for the military target, make sure the script is setup how you like it and duplicate a few times and spread them out, leave room for some exploding bottles as well.
Lets get some exploding targets going as well, a breaking bottle from the store.
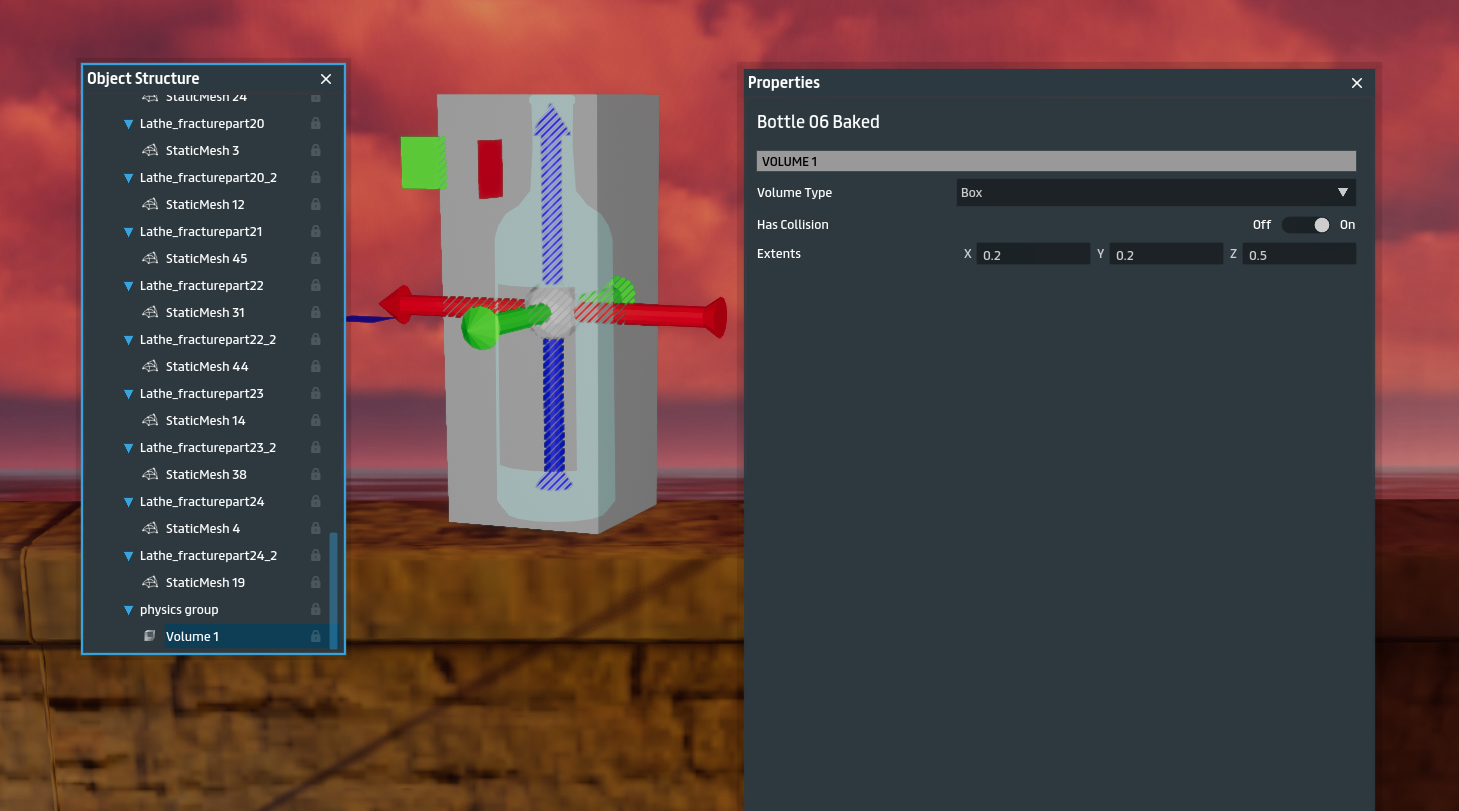
Starting with the bottle drag it out and set the initial settings Is Scriptable to On, Play back Mode to SinglePlay and Begin On Load to Off.

For this object I found that I needed to also adjust the volume component in order to make the target script work, by setting Volume Type to Box and resizing and positioning over the mesh.
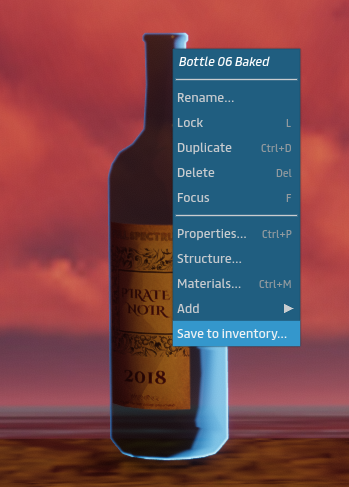
At this point save the bottle to your inventory and give it a distinct name.
Add the PewPewExtended script and enter a target event and a sound.
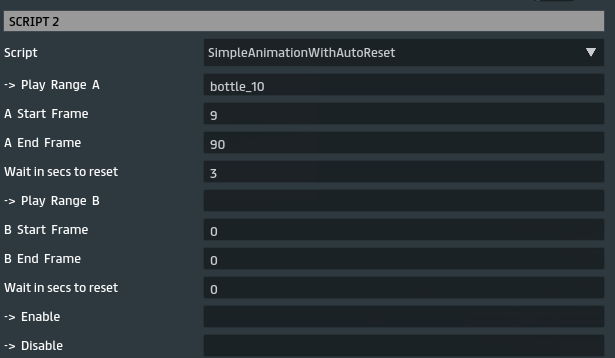
Next add the Animation Reset Script from the same creators of the breaking bottle to reset the animation a few seconds after the animation has played (read bottle breaking listing for animation frame details).
Run a build and test out, you should be breaking the bottles on hit and a few seconds later they reset to their full bottle form.